Administrative
Assistants List
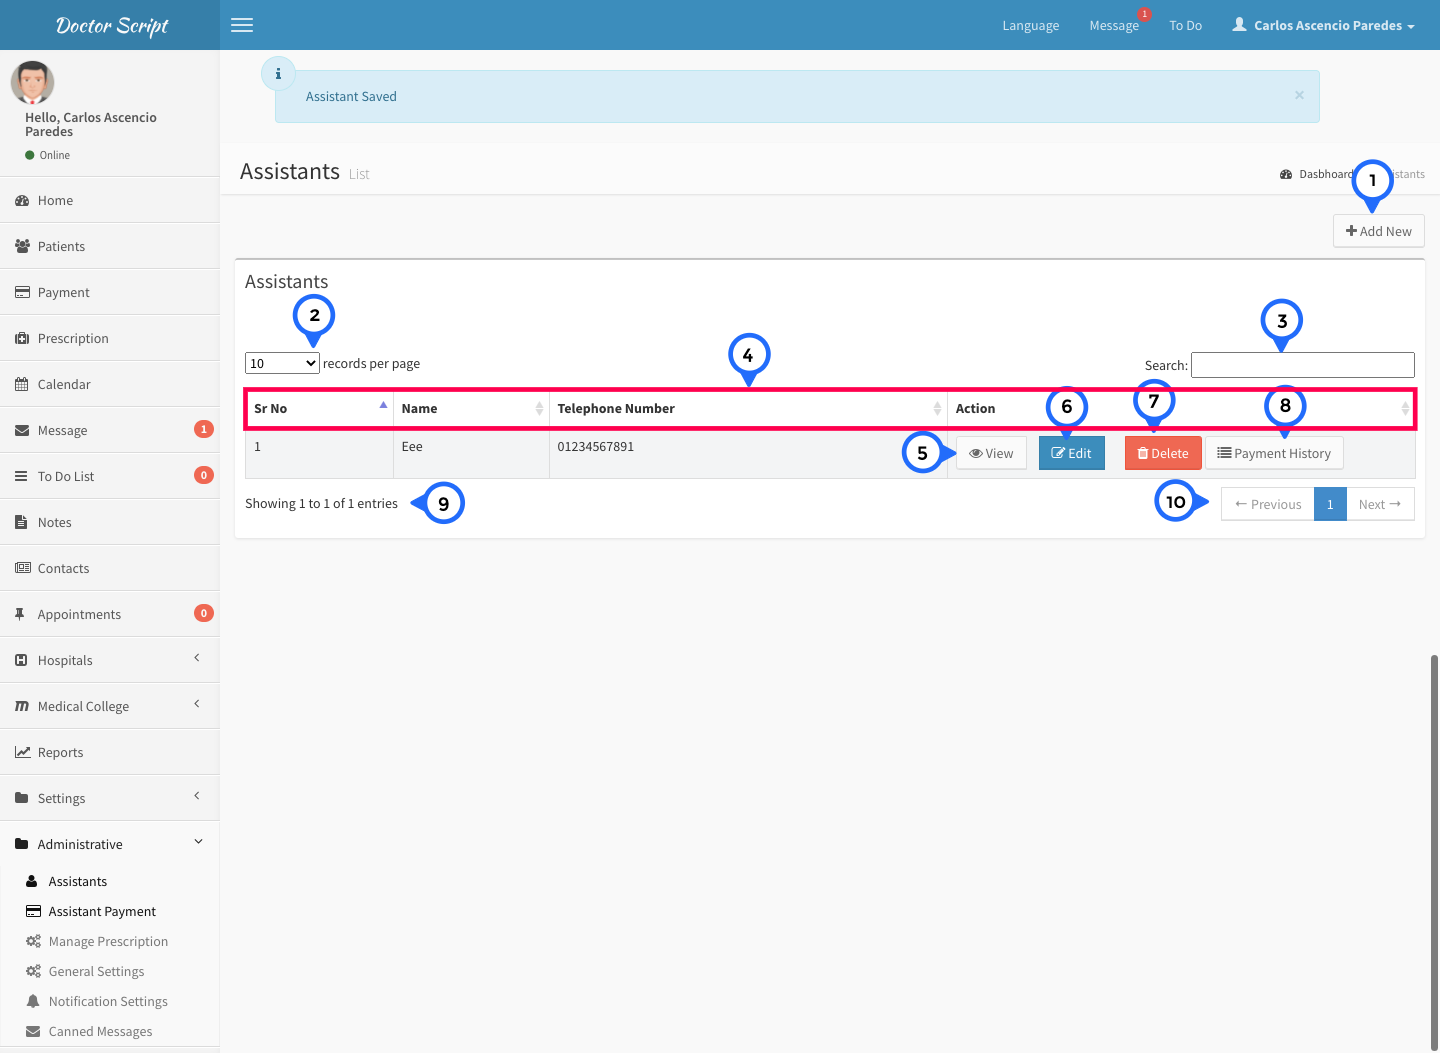
- 1) add new: click on add new then open form
- 2) show the how many record show in single page
- 3) search: search anything in message list
- 4) in this section show sr no, name, telephone number and action
- 5) view: click on view then open detail page
- 6) edit: click on edit then open form and edit particular record
- 7) delete: click on delete then delete particular record
- 8) payment history: click on payment history then goto payment history page for particular record
- 9) total no of record show in this section
- 10) paggination: goto previous or next page
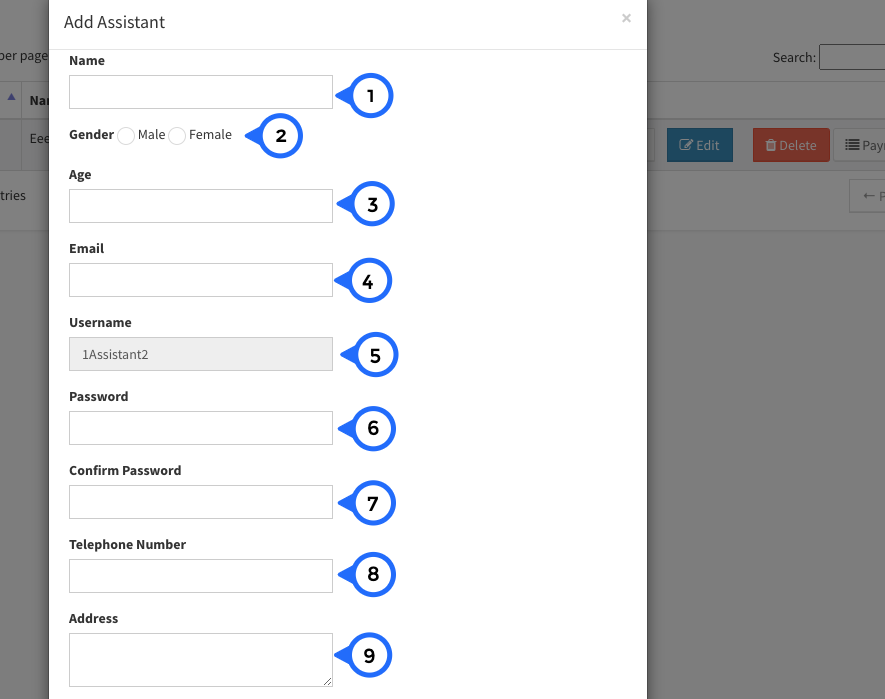
- 1) name: enter the name of assistant
- 2) gender: check the asistant gender
- 3) age: enter the age of assistant
- 4) email: enter the email of assistant
- 5) username: enter the username of assistant
- 6) password: enter the password of assistant
- 7) confirm password: enter the confirm password
- 8) telephone number: enter the telephone number
- 9) address: enter the full address
- 10) save: click on save all information save
Assistants Payment List
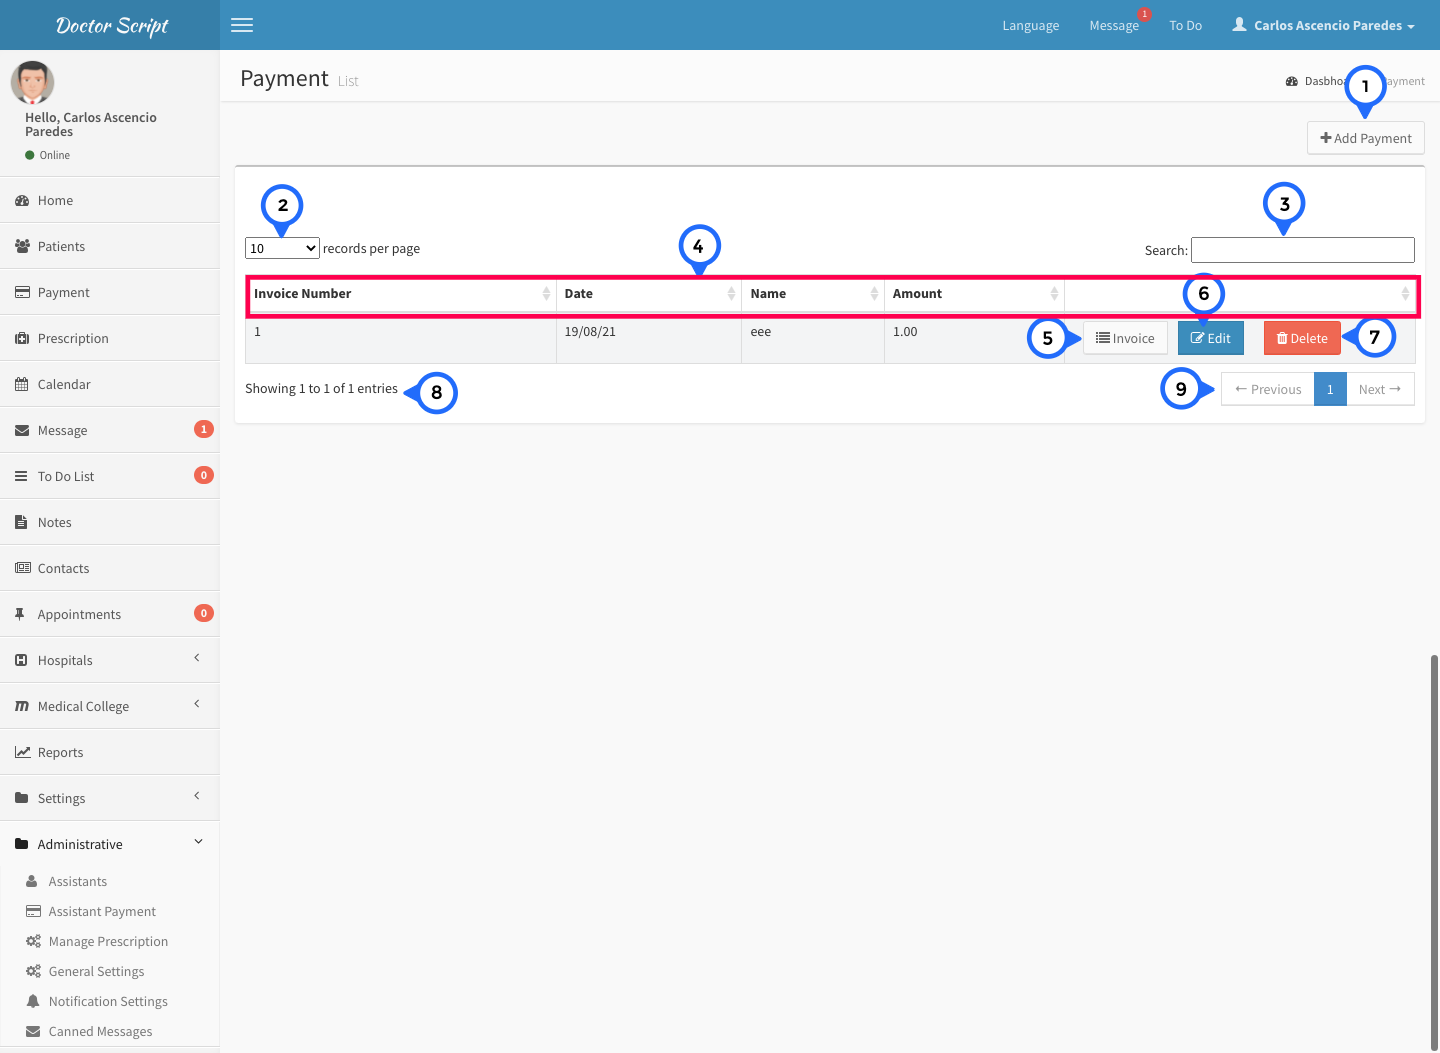
- 1) add new: click on add new then open form
- 2) show the how many record show in single page
- 3) search: search anything in message list
- 4) in this section show invoice number, date, name of assistant, amount and action
- 5) invoice: click on invoice then open invoice page
- 6) edit: click on edit then open form and edit particular record
- 7) delete: click on delete then delete particular record
- 8) total no of record show in this section
- 9) paggination: goto previous or next page
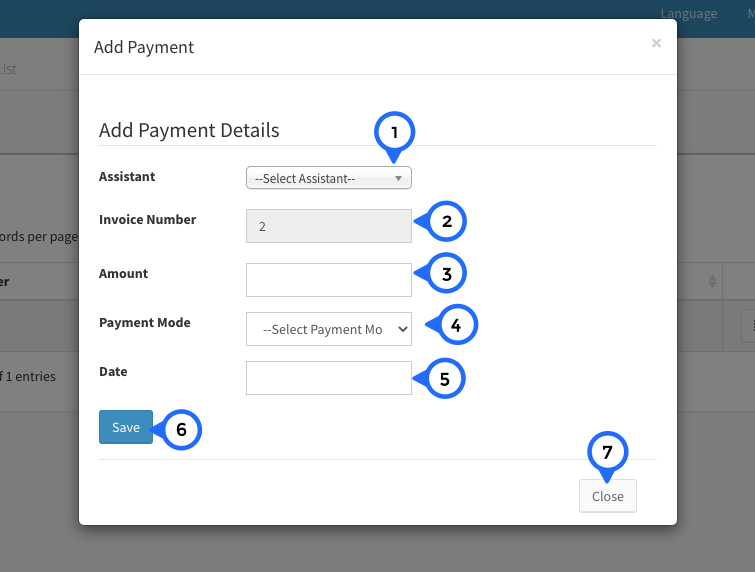
- 1) assistant: select assistant name from dropdown
- 2) invoice number: invoice number is automatically generated
- 3) amount: enter the assistant payment amount
- 4) mode: select payment mode
- 5) date: select date from datepicker
- 6) save: click on save all information save
- 7) close: click on close then popup close
Assistants Payment Invoice
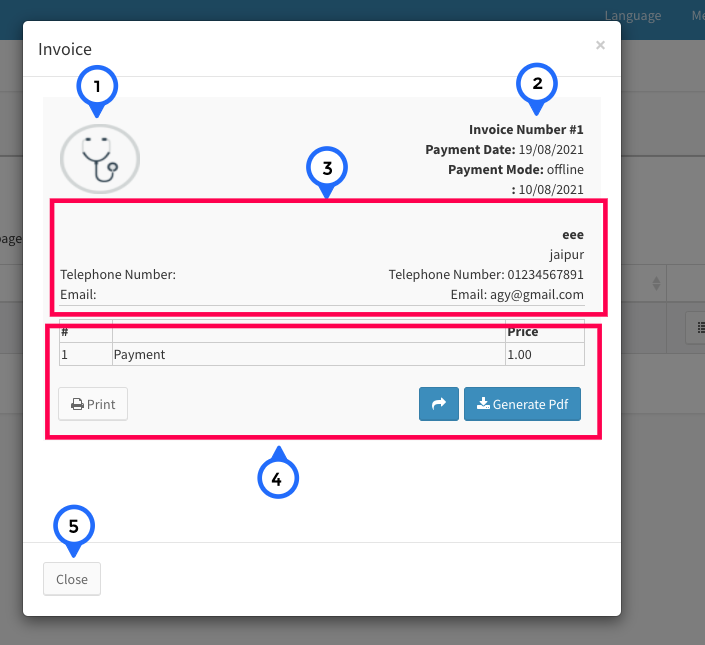
- 1) logo: show the logo of website
- 2) in this section show invoice number, payment date, payment mode and current date
- 3) assistant telephone number email and address and name
- 4) payment detail you can print this invoice or generate pdf click above invoice have generage pdf
- 5) close: click on close button above popup box close
Manage Prescription
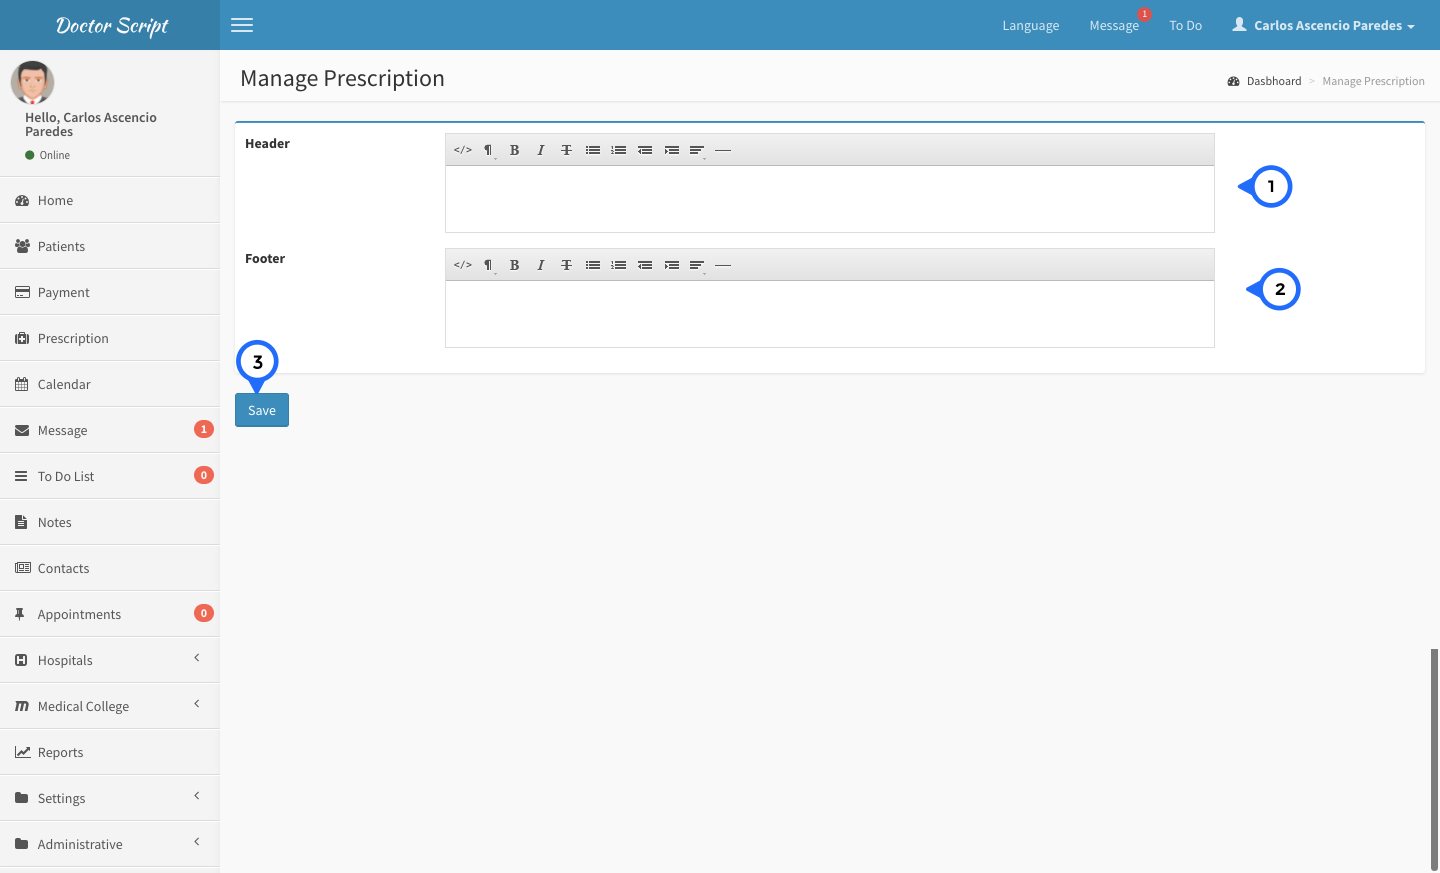
- 1) header: set header setting of website
- 2) footer: set footer setting of website
- 3) save: click on save detail save.
General Settings
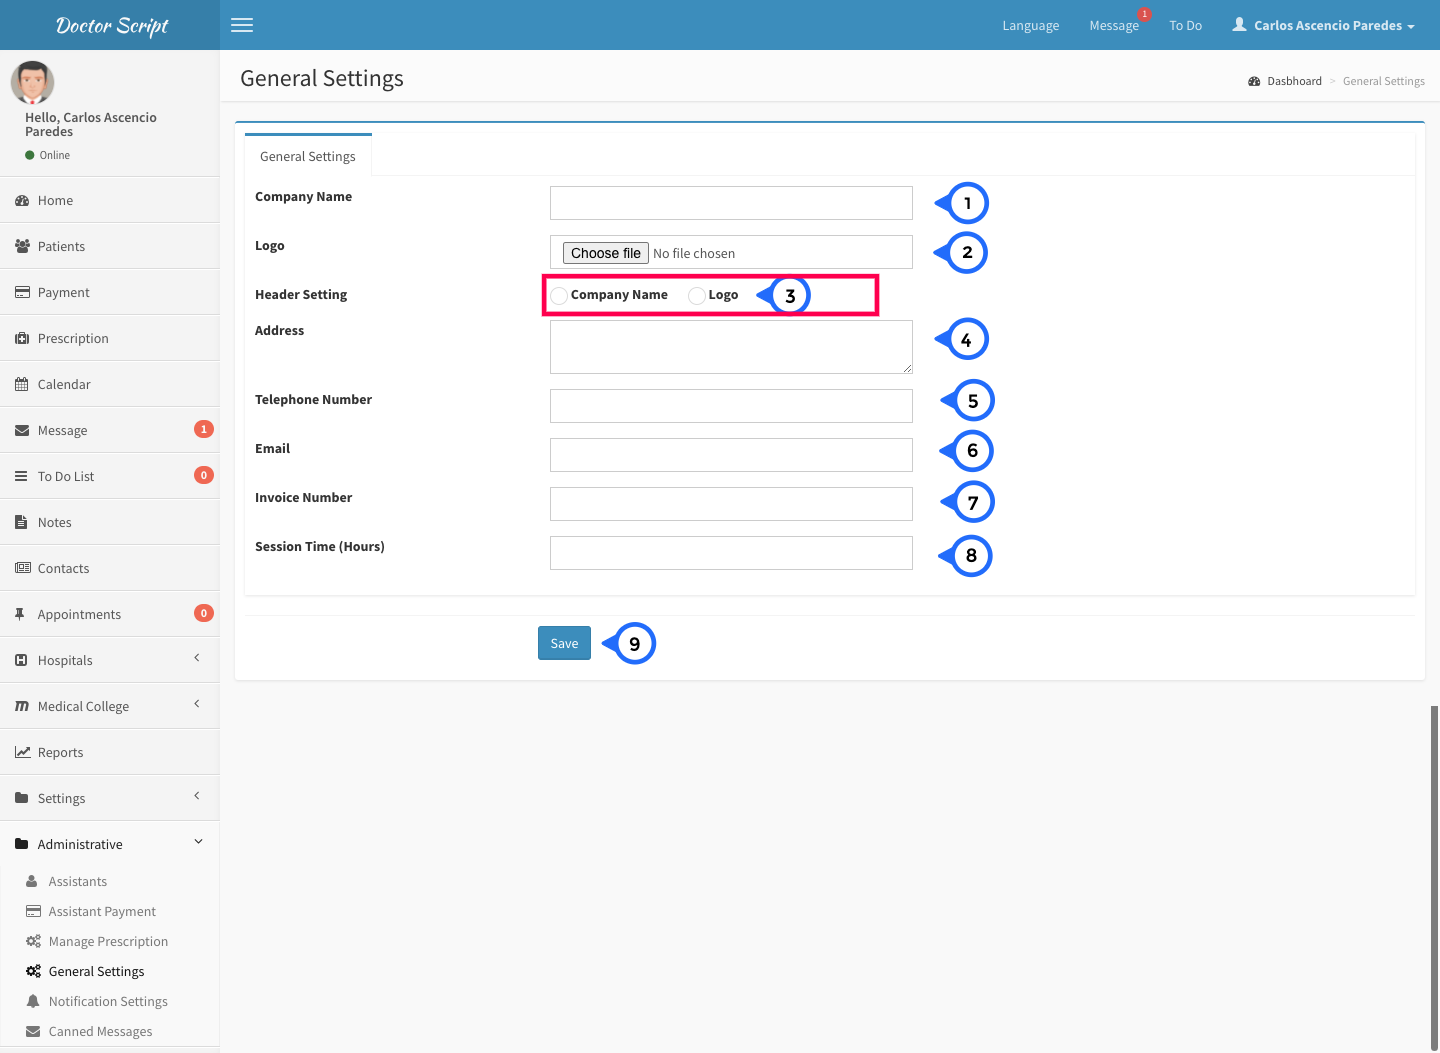
- 1) company name: set the name of company or website
- 2) logo: set the logo of website
- 3) header setting: choose one if you want to set company name in header then check company name otherwise check logo
- 4) address: set the address of company
- 5) tel number: set the telephone number of company
- 6) email: set the email of company
- 7) invoice number: set the invoice number starting number
- 8) session time: set session time in hours
- 9) save: click on save then all information save
Notification Settings
- 1) appointment alert: set the number of days alert for appoitnemnt.
- 2) to do alert: set the number of days for todo.
- 3) save: click on save then all information save
Canned Message List
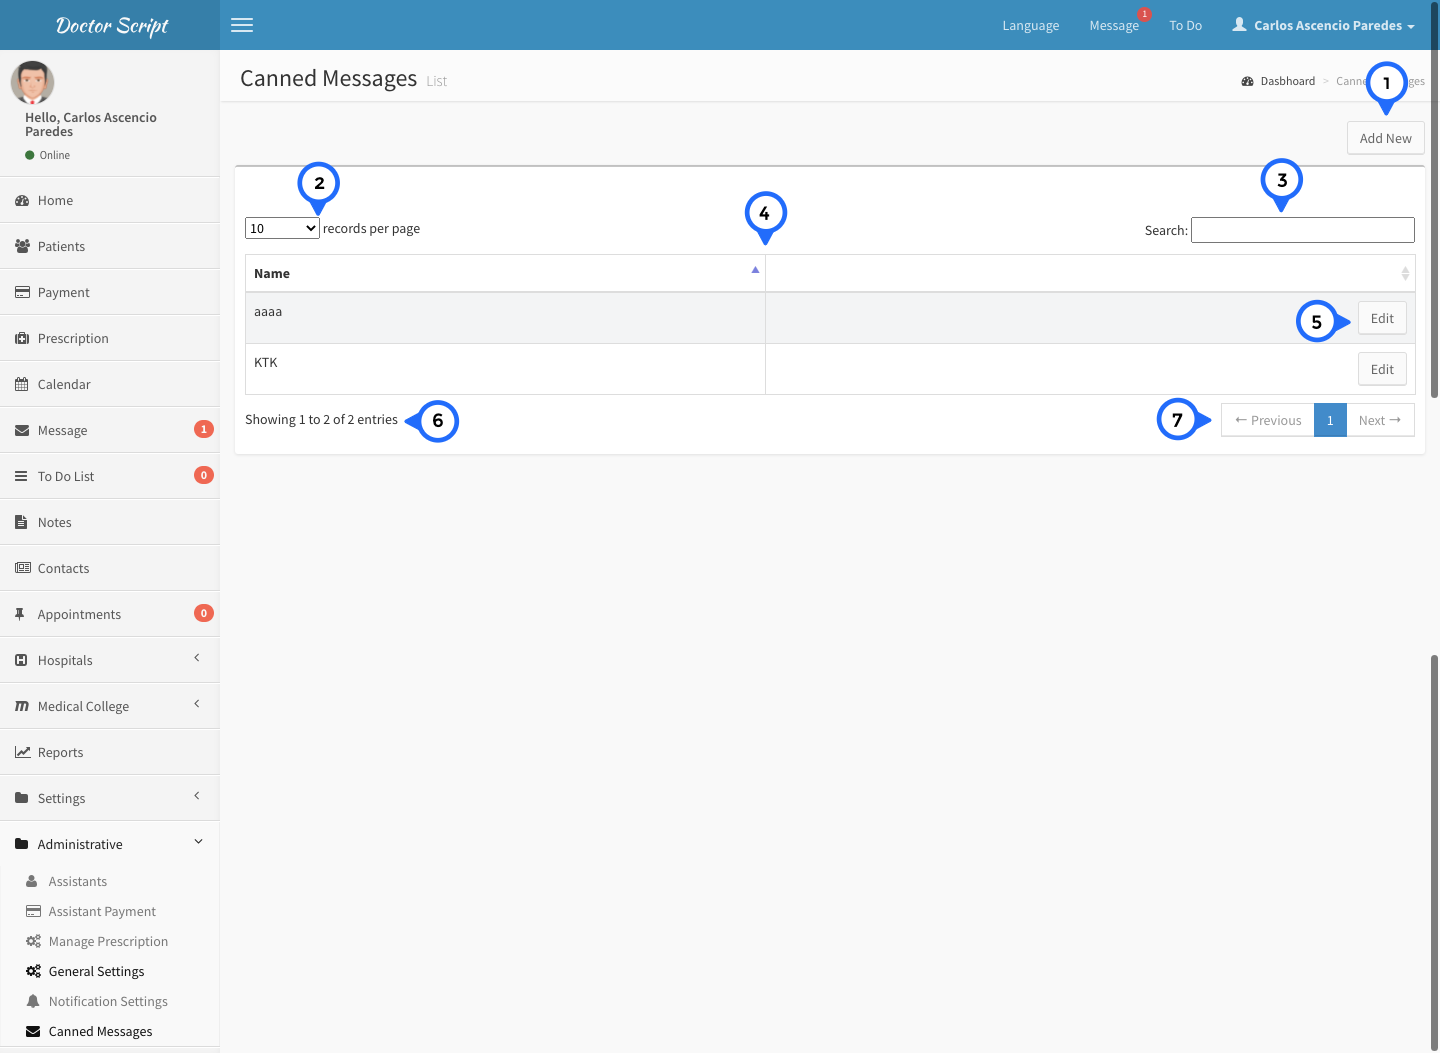
- 1) add new: click on add new then open form
- 2) show the how many record show in single page
- 3) search: search anything in message list
- 4) in this section show name and action
- 5) edit: click on edit then open form and edit particular record
- 6) total no of record show in this section
- 7) paggination: goto previous or next page
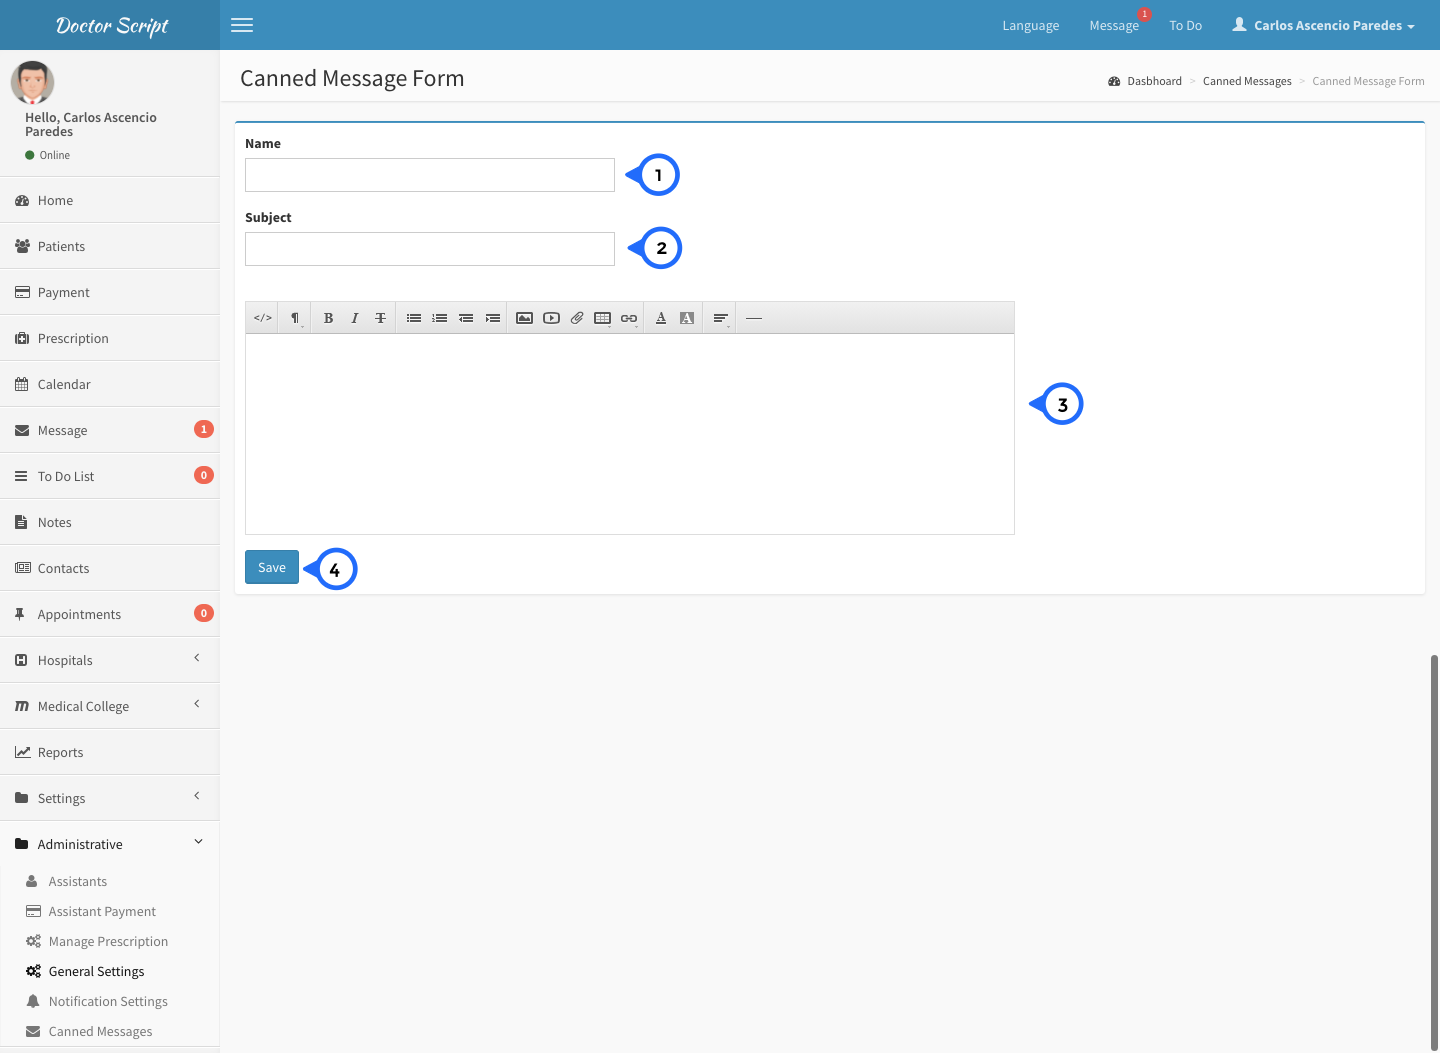
- 1) name: in this field add name of message
- 2) subject: in this field set the subject of message
- 3) description: in this field set the short description about message
- 4) save: click on save then all information save