Custom Field
Custom Field List
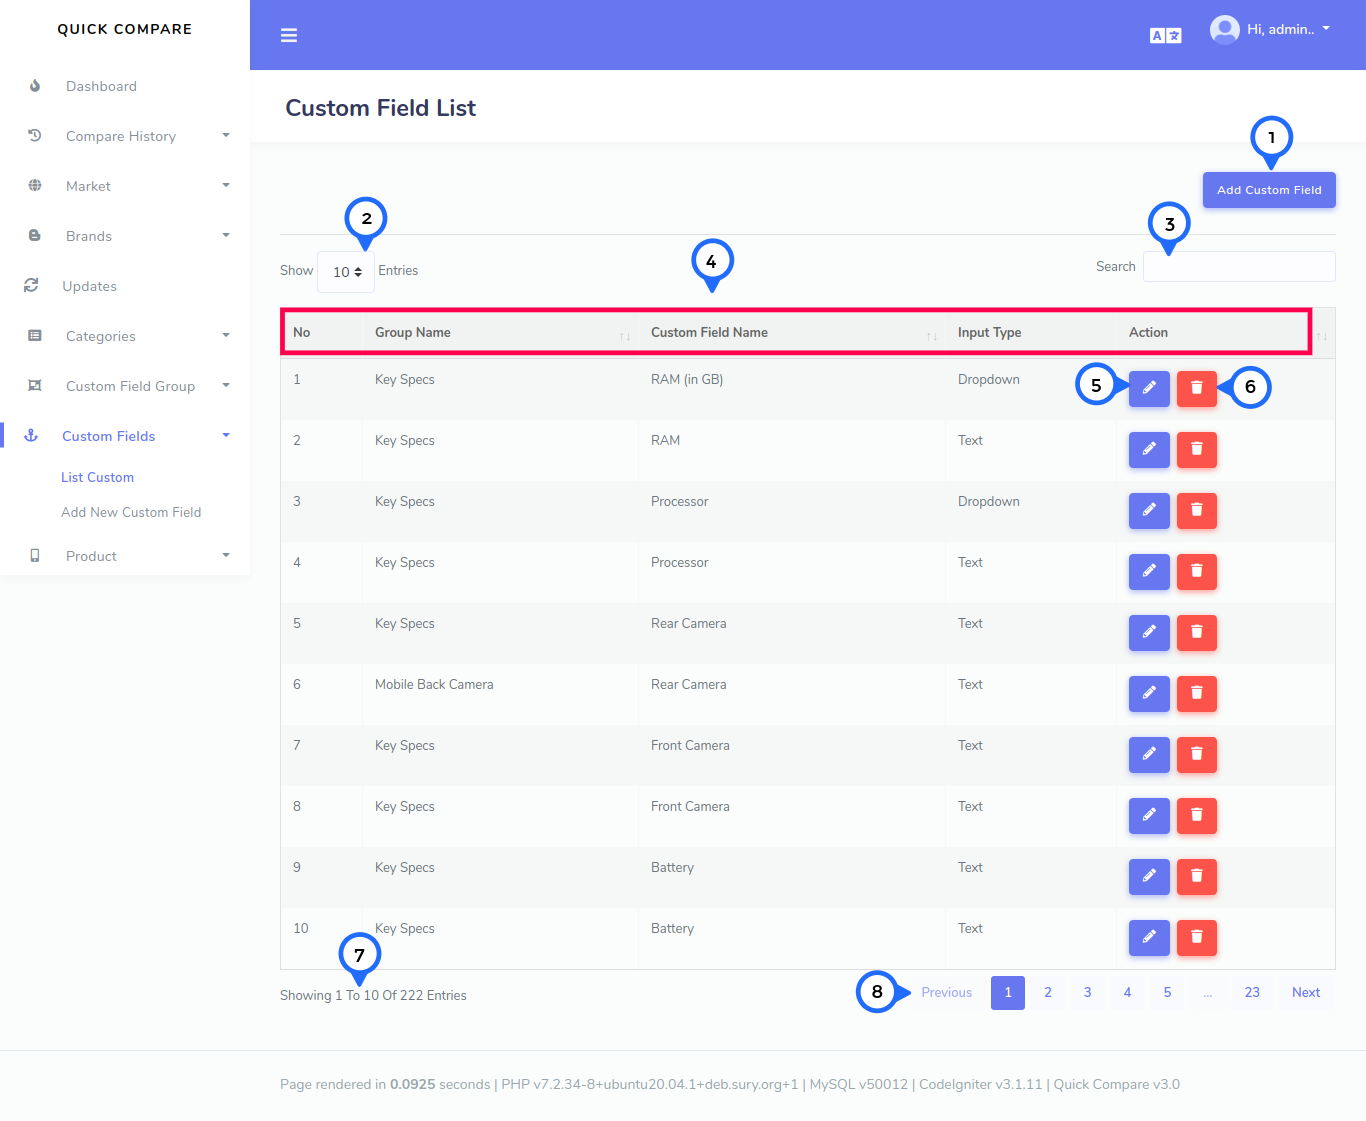
- 1) Add Custom Field: Click on add Custom field then goto custom field add form
- 2) Per Page Item: This dropdown show no of list item on page when click any number then show number of items
- 3) Search Item: This search box is usefull for search any item from the list
- 4) In this section show Number,Group Name,Custom Field Name,Input Type,Action
- 5) Edit: Click on this button then goto edit form page
- 6) Delete:Click on this button then delete particular row item
- 7) showing: show the number of total records and show in one page record
- 8) pagging: paggination for goto next page and previous page
Custom Field Add
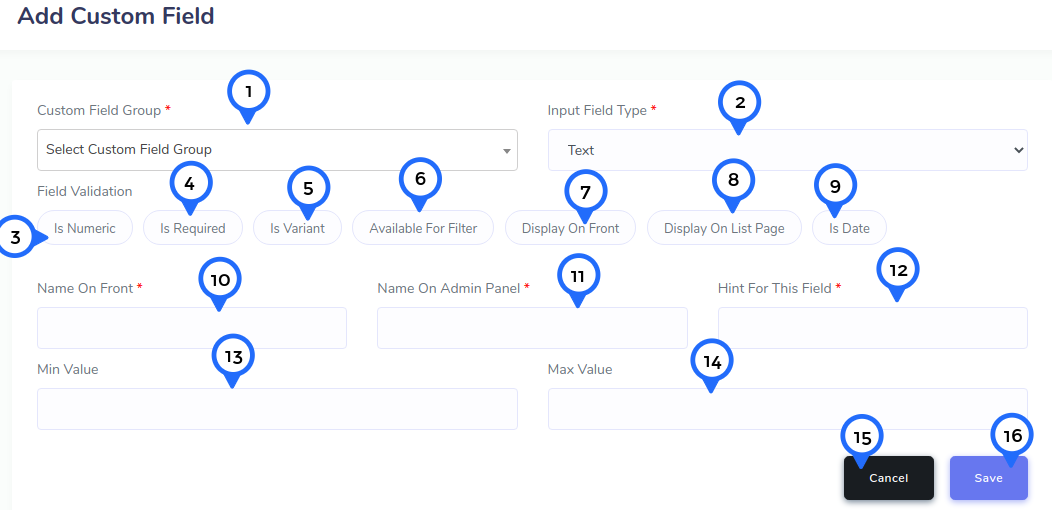
- 1) Custom field group: In this dropdown choose one custom field group
- 2) Input field type: In this dropdown choose one input type field
- 3) Is numeric: click on this button then set validation as numeric
- 4) Is Required: click on this button then set validation as field required
- 5) Is variant: click on this button then set validation as field variant
- 6) Available for filter: click on this button then set validation as filter
- 7) Display on front: click on this button then set validation as display on front or not
- 8) Display on list page: click on this button then set validation as display on list or not
- 9) Is date: click on this button then set validation as date
- 10) Name on front: in this input field show which name to show on front
- 11) Name on admin panel: in this input field show which name to show on admin
- 12) Hint: in this input field add hint
- 13) Min value: set minimum value for above custom field
- 14) Max value: set maximum value for above custom field
- 15) Cancel: Click on this button then goto custom field list page
- 16) Save: Click on this button then add all custom field data save
Custom Field Edit

- 1) Custom field group: In this dropdown choose one custom field group
- 2) Input field type: In this dropdown choose one input type field in the image select dropdown
- 3) Is numeric: click on this button then set validation as numeric in the image numeric is checked
- 4) Is Required: click on this button then set validation as field required in the image required is checked
- 5) Is variant: click on this button then set validation as field variant
- 6) Available for filter: click on this button then set validation as filter in the image filter is checked
- 7) Display on front: click on this button then set validation as display on front or not
- 8) Display on list page: click on this button then set validation as display on list or not
- 9) Is date: click on this button then set validation as date
- 10) Name on front: in this input field show which name to show on front
- 11) Name on admin panel: in this input field show which name to show on admin
- 12) Hint: in this input field add hint
- 13) Options: Here if point no 2 input type is select dropdown,checkbox,radio then show options and in this field set options value
- 14) Add More: click on this then more options add
- 15) Options: set the option value
- 16) Remove: click on remove then above row remove from option section
- 17) Cancel: Click on this button then goto custom field list page
- 18) Update: Click on this button then update all custom field data