Patient
Patient List
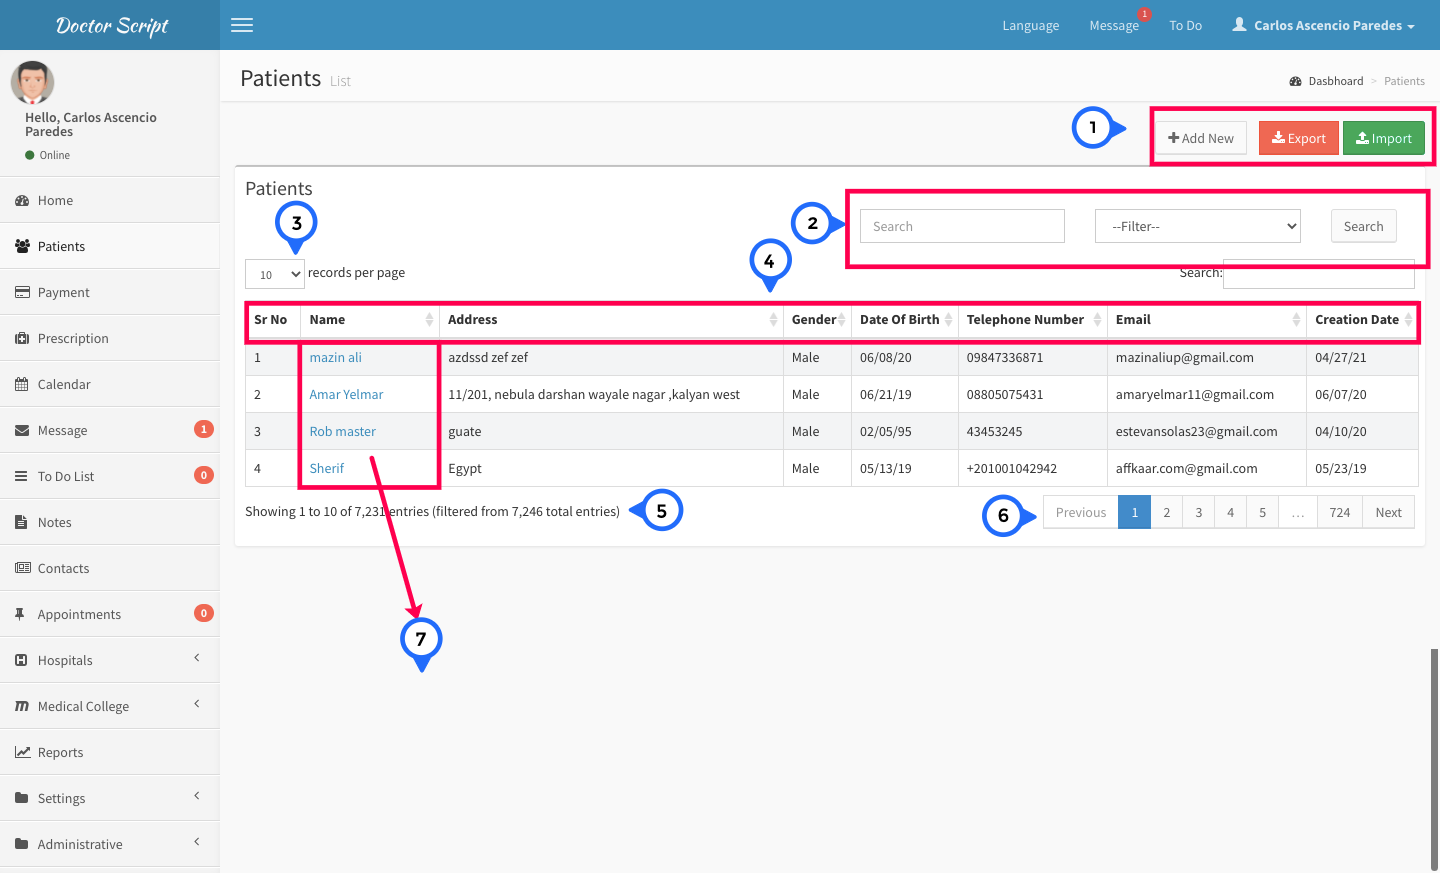
- 1) Button: add new click on goto patient form export click then all patient list export and import click on then open import page
- 2) search: search anything from existing list of patient.
- 3) show the how many item show on single page
- 4) in this section show sr no, name, address, gender, date of birth, telephone number, email and added date
- 5) show the total number of patient
- 6) paggination: this paggination you can go further page and previous page
- 7) name: click on name then open detail page of patient
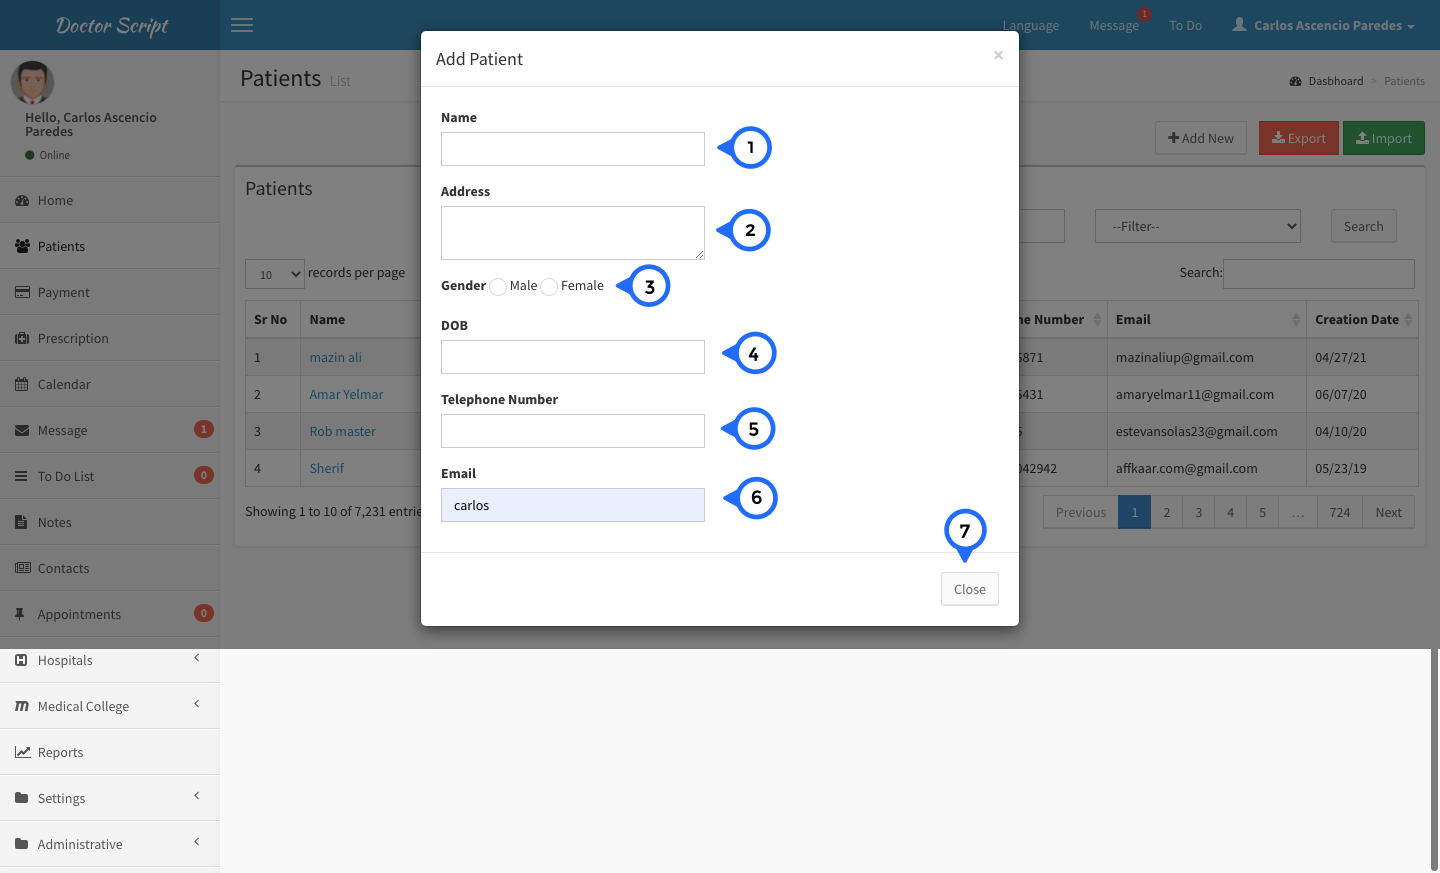
- 1) Name: enter the patient name
- 2) Address: enter the patient address
- 3) Gender: select one gender of patient
- 4) dob: enter date of birth of patient
- 5) telephone number: enter patient tel. number
- 6) email enter patient email, password and confirm password and save all information about patient
- 7) close: click on close form close
Patient Import
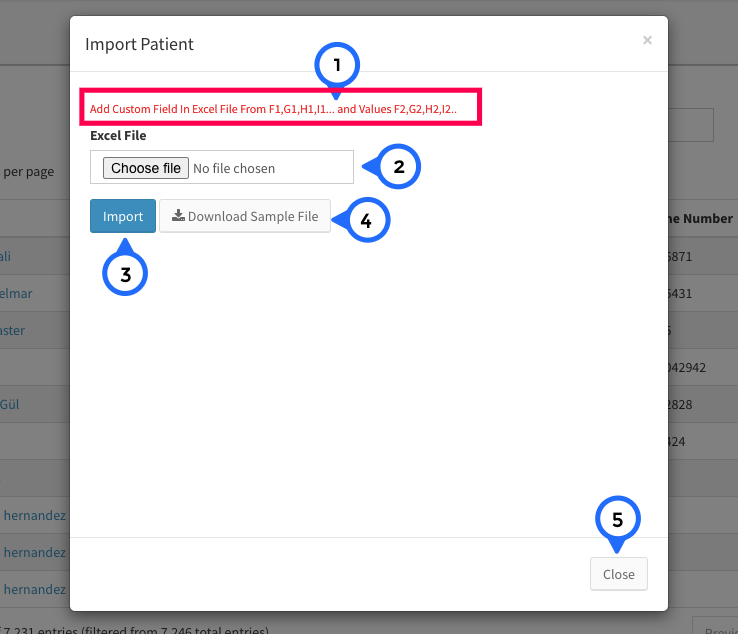
- 1) Note: Add Custom Field In Excel File From F1,G1,H1,I1... and Values F2,G2,H2,I2..
- 2) upload excel file like sample file which can download from click download file
- 3) import: click on import then uploaded file import
- 4) download: click on sample file then sample file download
Patient View
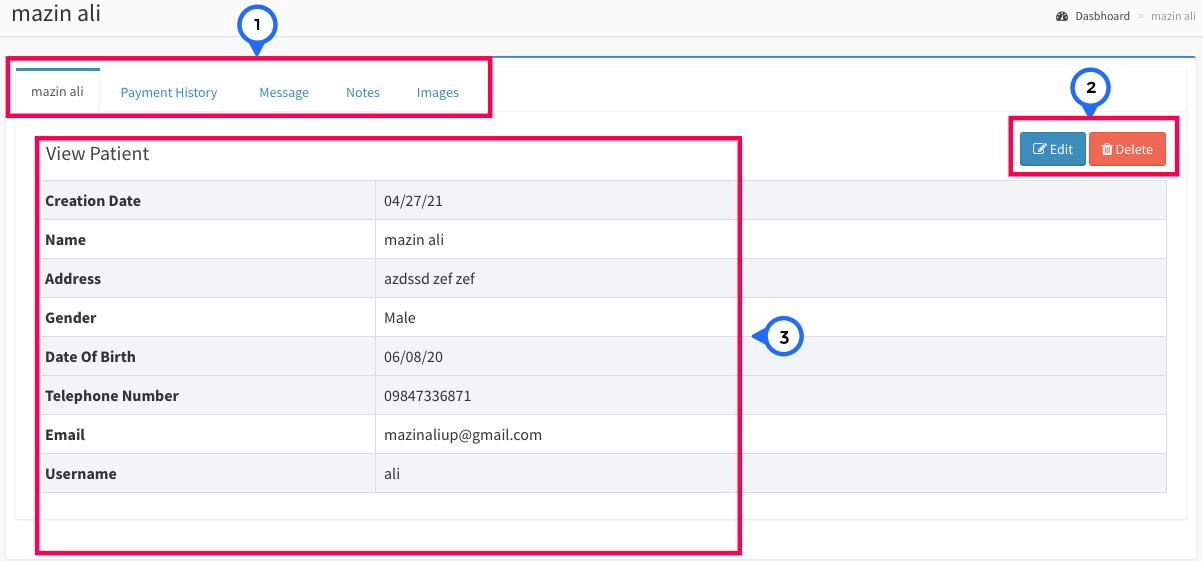
- 1) Tab: show the result in tabs first tab detail about patient, payment history, message, notes and images
- 2) button: you can edit particular patient data and delete particular
- 3) view patient: you can see the detail of patient
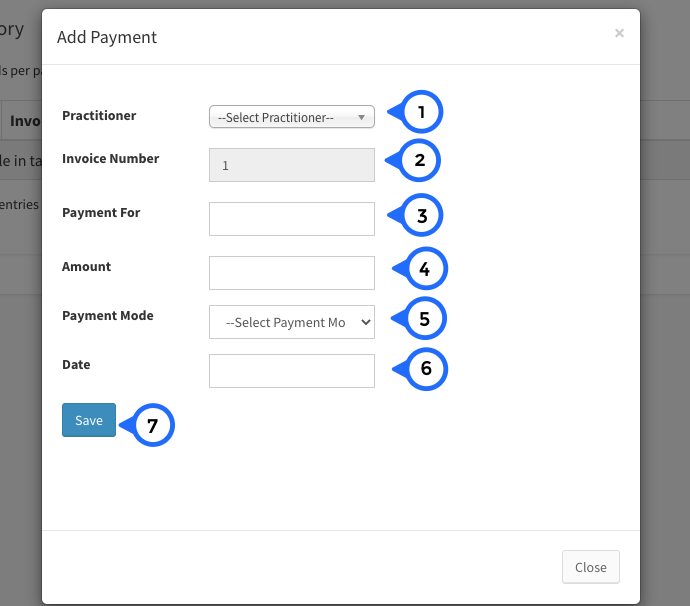
- 1) select practitioner from dropdown
- 2) invoice number is auto generated
- 3) payment for which type of payment you want to pay
- 4) amount: enter the amount for you want to pay
- 5) mode: select payment mode from dropdown
- 6) date: select date from calendar
- 7) save: click on save then all payment data save
Message
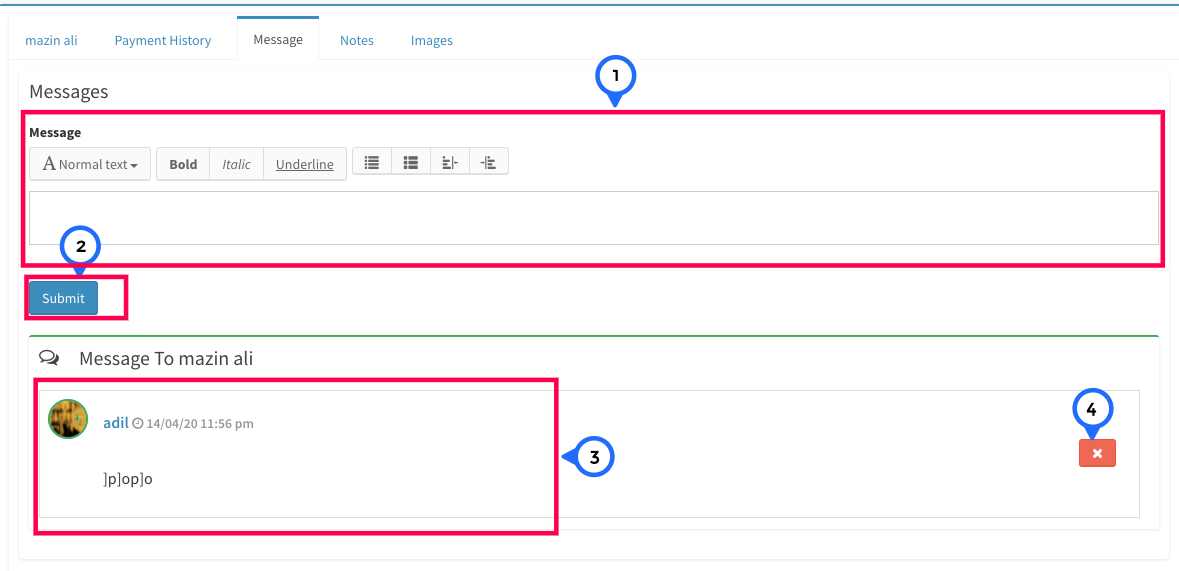
- 1) in this field enter message
- 2) submit: click on submit you message save
- 3) message area show name of user, date time and message
- 4) delete: you can delete each message
Note
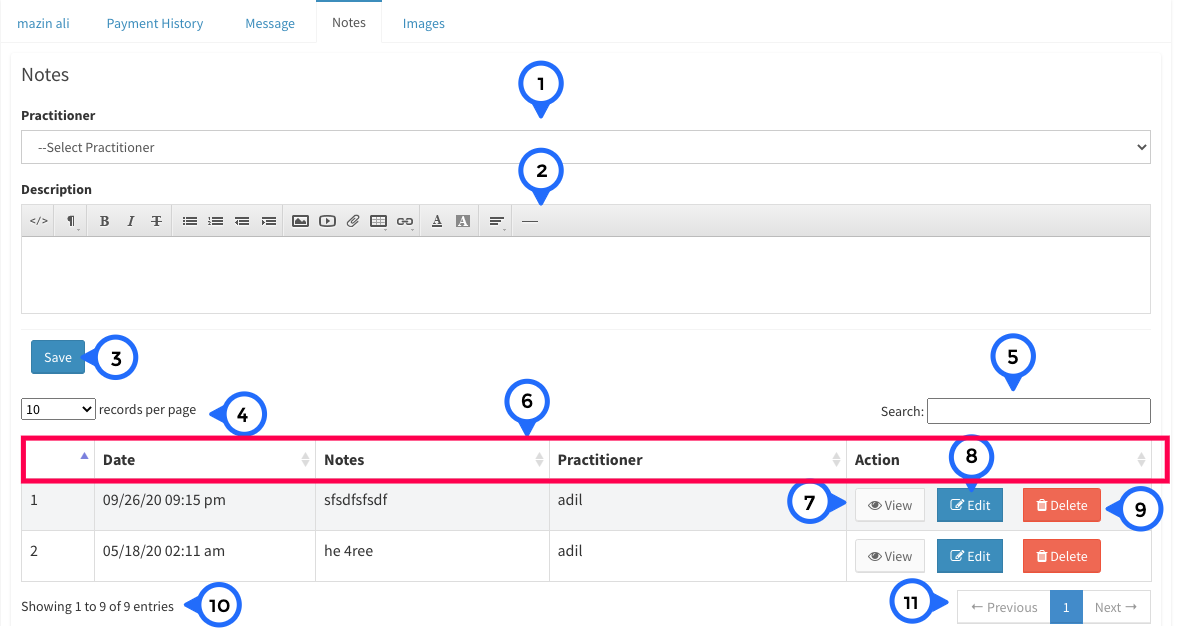
- 1) select practitioner from dropdown
- 2) enter description in this field
- 3) click on save note
- 4) no of record show in single page
- 5) search anything you can search from notes list
- 6) in this section show sr no, date, notes, practitioner name and action
- 7) click on view then open particular note view
- 8) click on edit then open edit page for particular note
- 9) click on delete then delete particular record
- 10) show the no of record
- 11) paggination you can go next and previous page
Edit Note
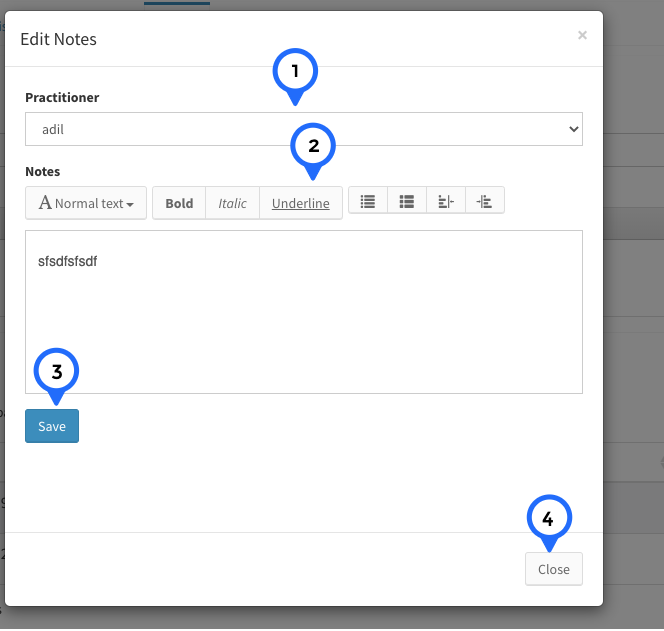
- 1) select practitioner from dropdown
- 2) in this field enter any note in note area
- 3) click on save then particular note edit
- 4) click on close then popup box close
Image
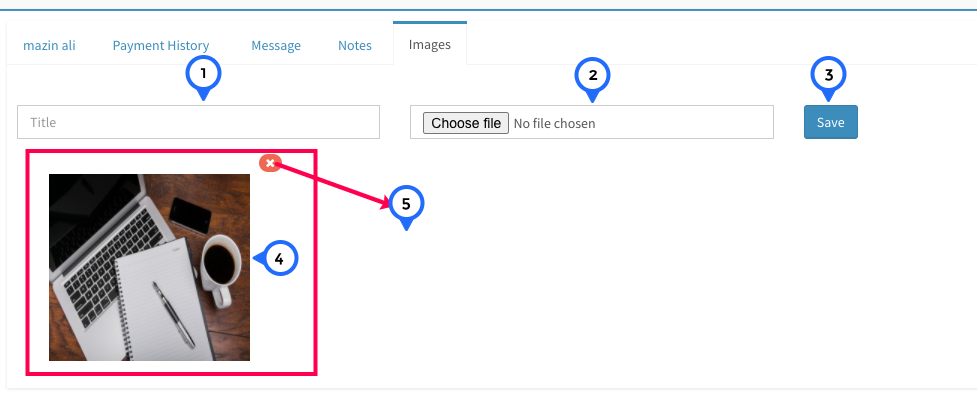
- 1) in this field set title of image
- 2) click on upload you can upload image
- 3) save: click on save button then title and image save
- 4) show the image which you upload
- 5) click on remove then particular image delete