Cases
All Cases
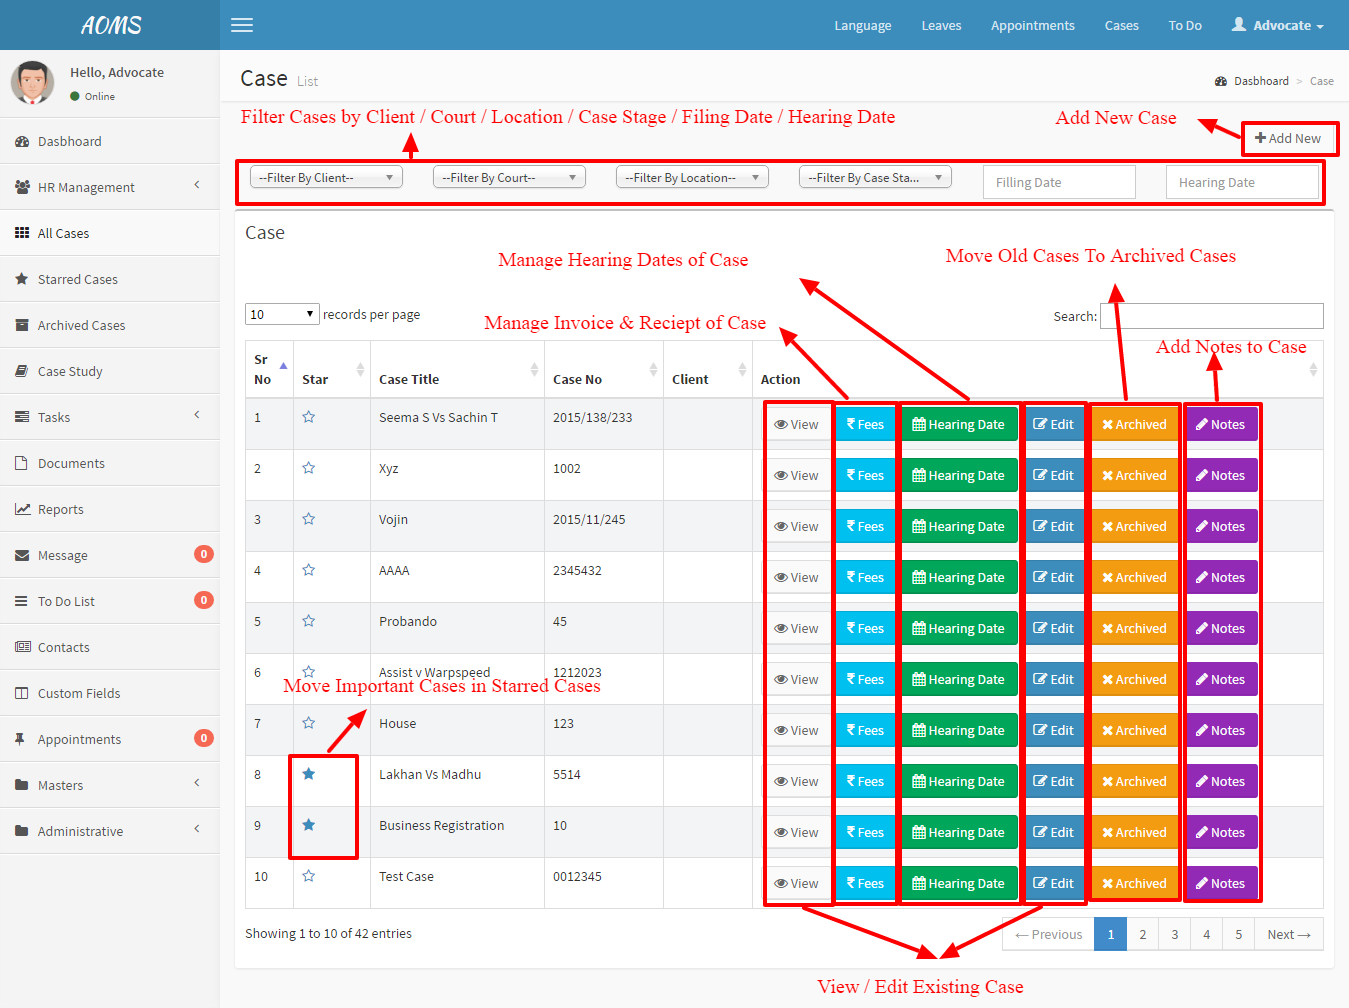
Admin can create new cases and update existing cases. Admin can also move important cases to Starred Cases and old ones to Archived Cases. Cases Hearing Dates, Fees and Notes can be managed. Case need to move into Archived Section then can delete.
Case Form
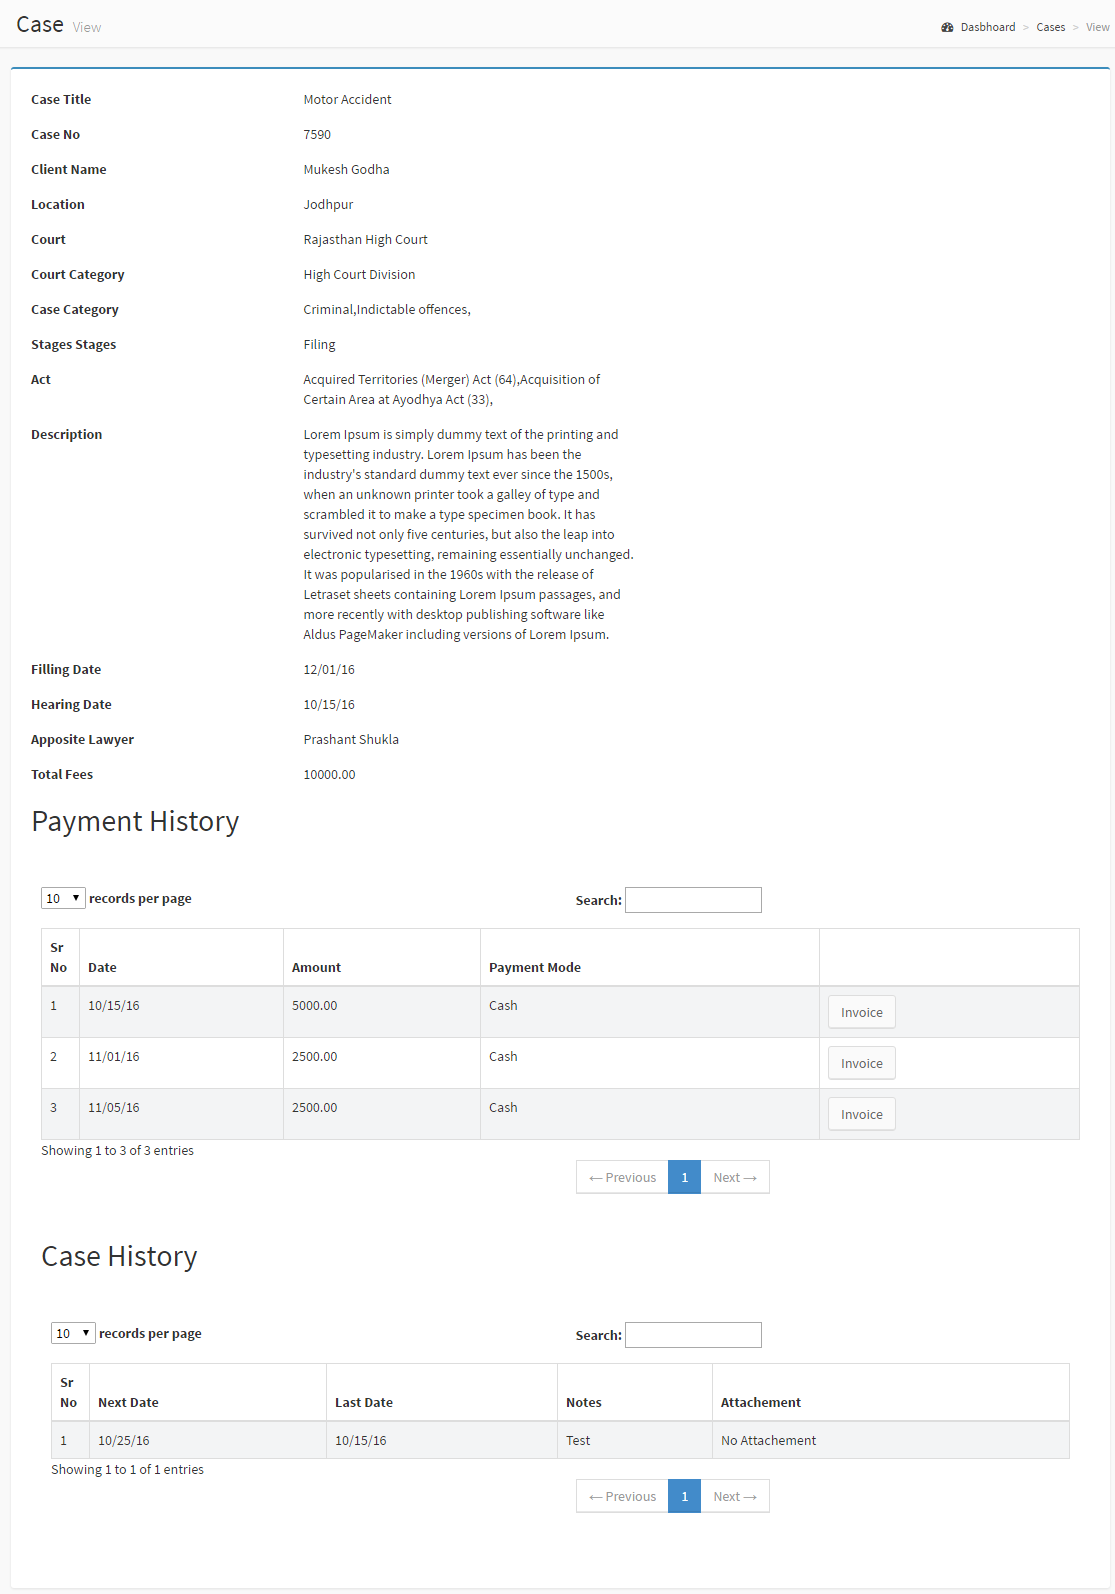
Case Title: Title of Case/Matter.
Case No: Number of Case which is opted from Court.
Client Name: Client belongs to particular case if not in list then need to Add New Client.
Location: Location of court in which case is running. Obtained from Location Master.
Court Category: Category of court in which case is running. Obtained from Court Category Master.
Court: Name of Court in which case is running. Obtained from Court Master.
Case Category: Category of Case. Obtained from Case Category Master.
Case Stage: Current Stage of Case. Obtained from Case Stages Master.
Act: Which Acts needs to perform in Case. Obtained from Act Master.
Description: Description of Case.
Filling Date: On Which Date case is filled in Court.
Hearing Date: On Which Date First Hearing is held in Court.
Apposite Lawyer: Name of Opposite Lawyer.
Total Fees: Fees of Case.
View Case
Invoice
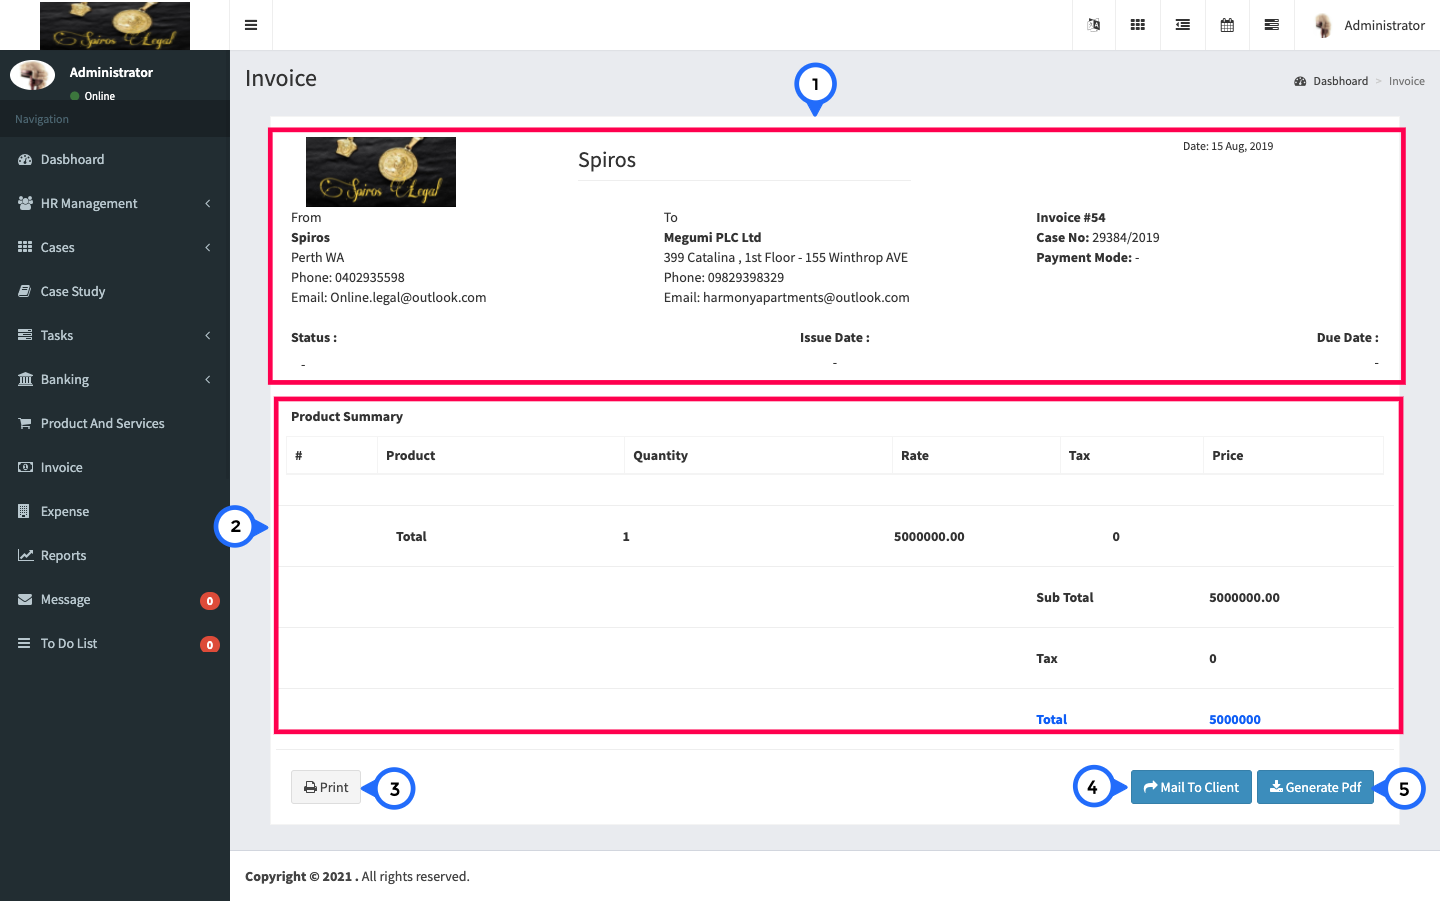
- 1) in this section show the sender address and receiver address of and invoice no. case status, issue date, due date
- 2) summary: detail about product like rate, tax, quantity.
- 3) print this invoice
- 4) mail to client
- 5) generate pdf
Fees
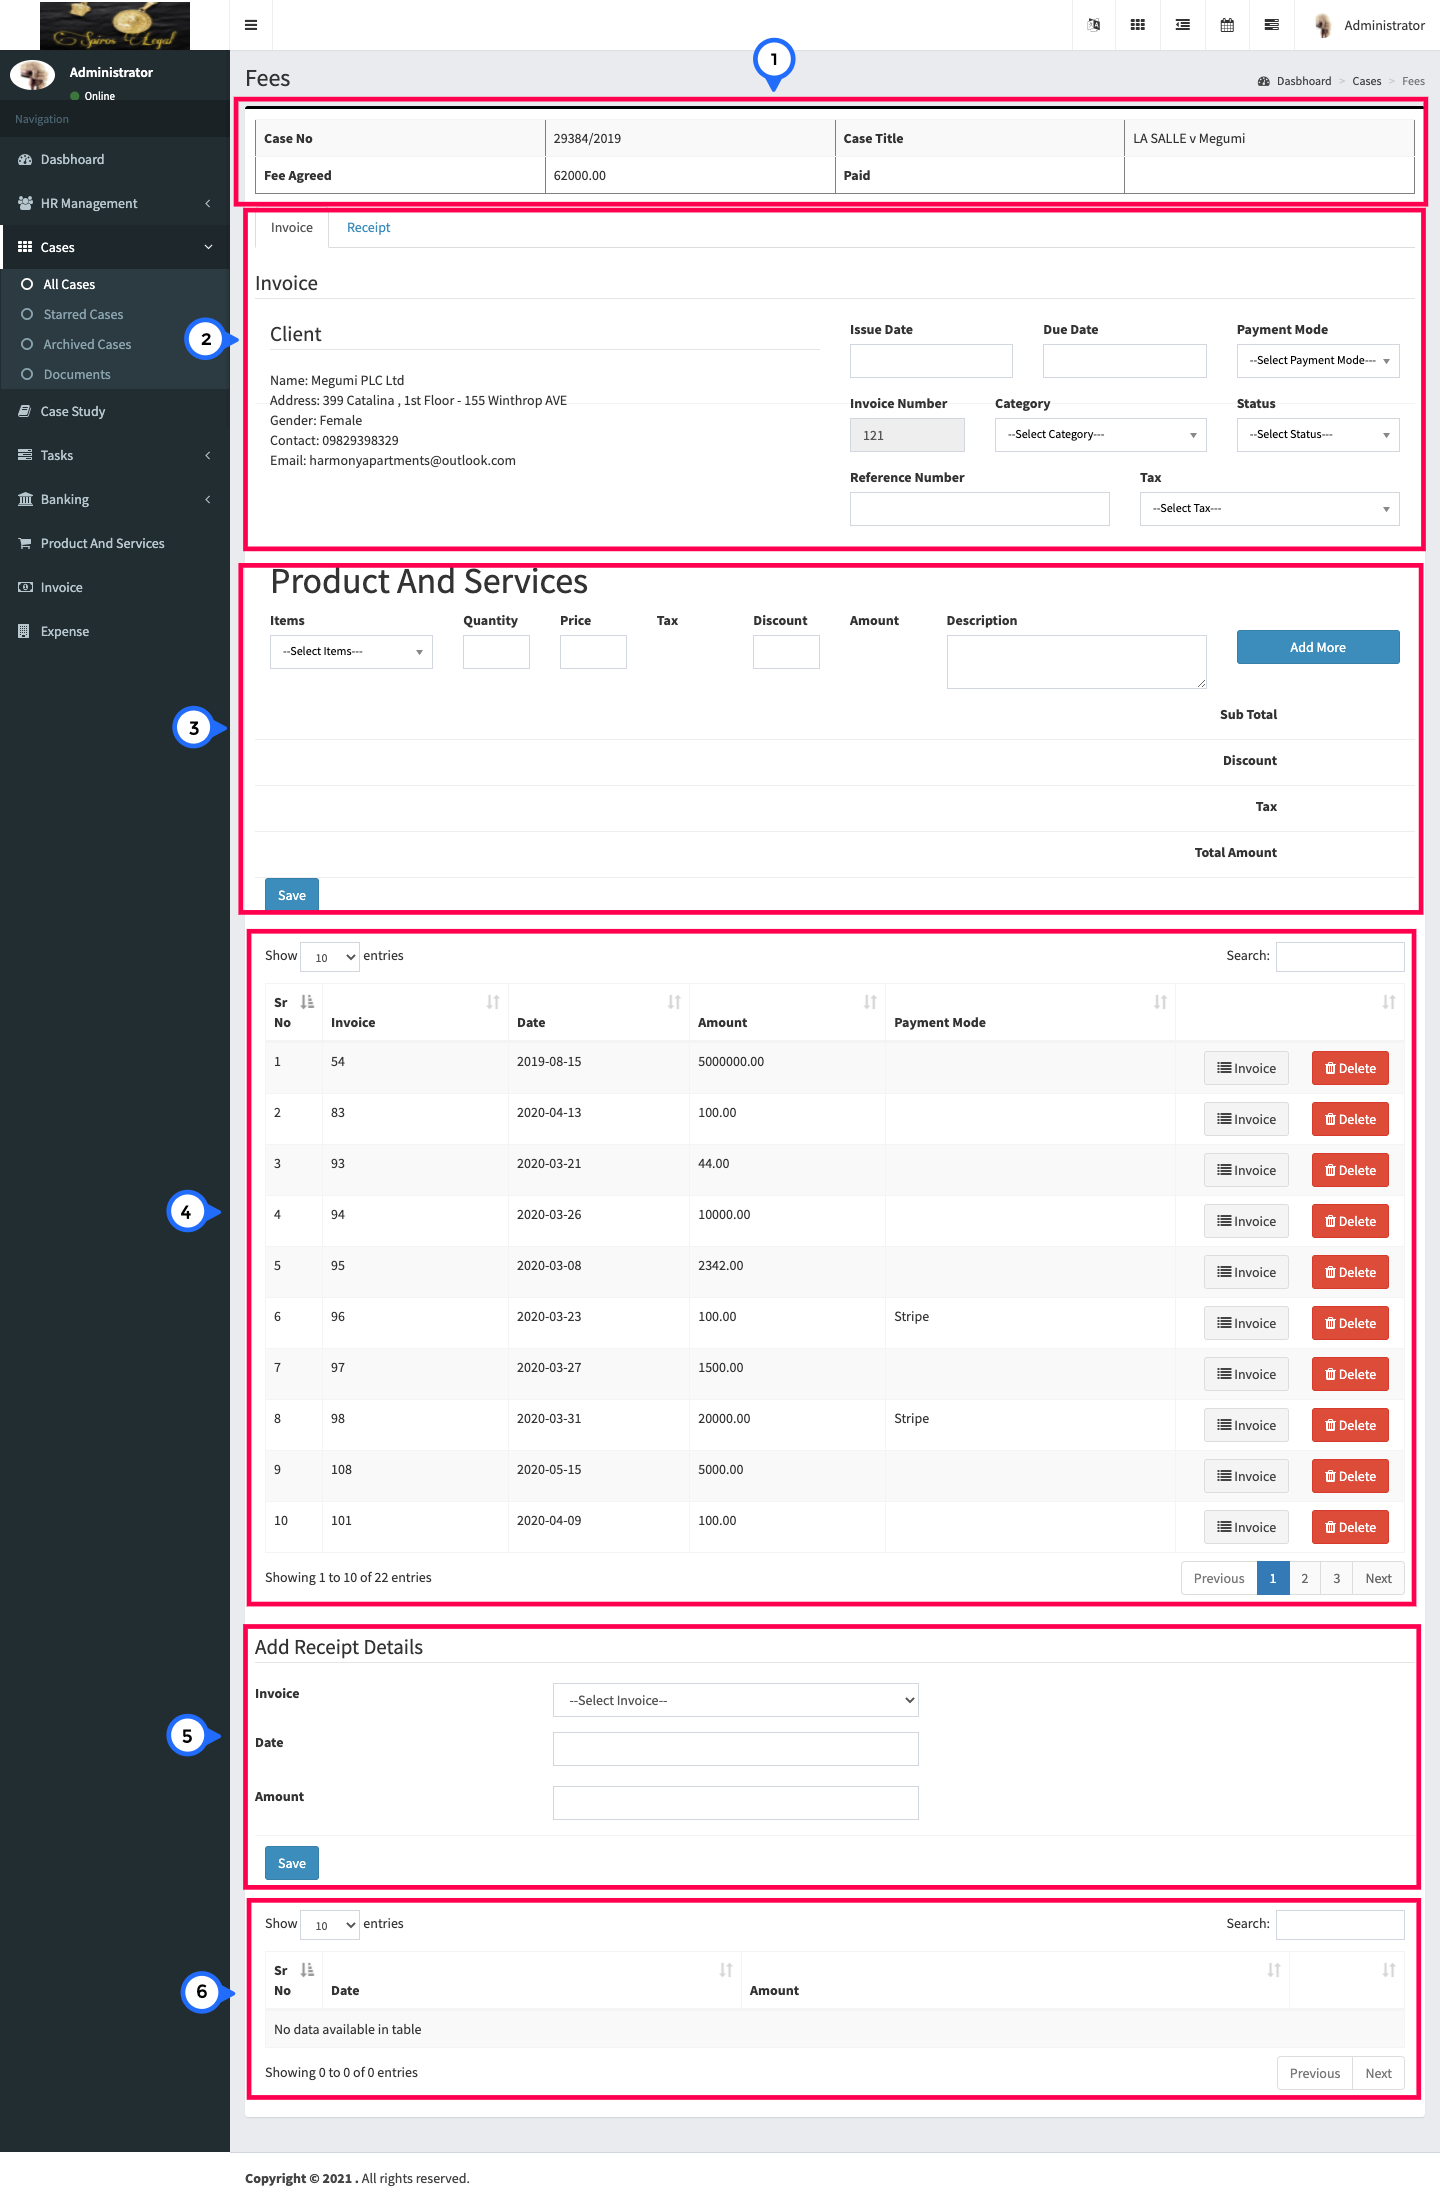
- 1) show the detail of case
- 2) generate invoice particular client
- 3) product and service : detail about product like qty, price, tax, discount, amount, description and save.
- 4) list of created invoice and product service you can click on invoice then goto invoice page and delete particular invoice
- 5) receipt detail: detail about receiver
- 6) show the list of receipt
Hering Date
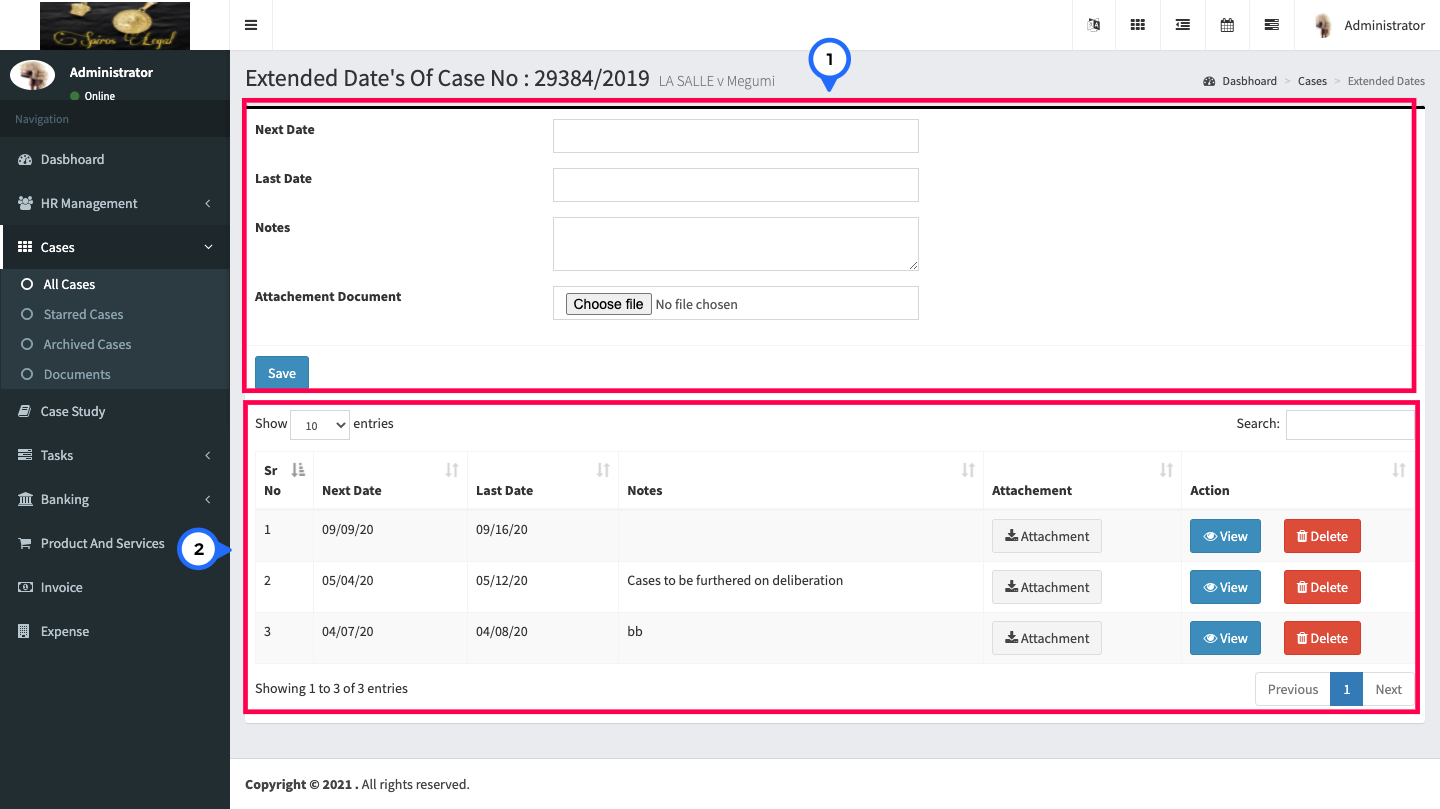
- 1) in this form you can set next hearing date
- 2) list of hearing date
Case Edit
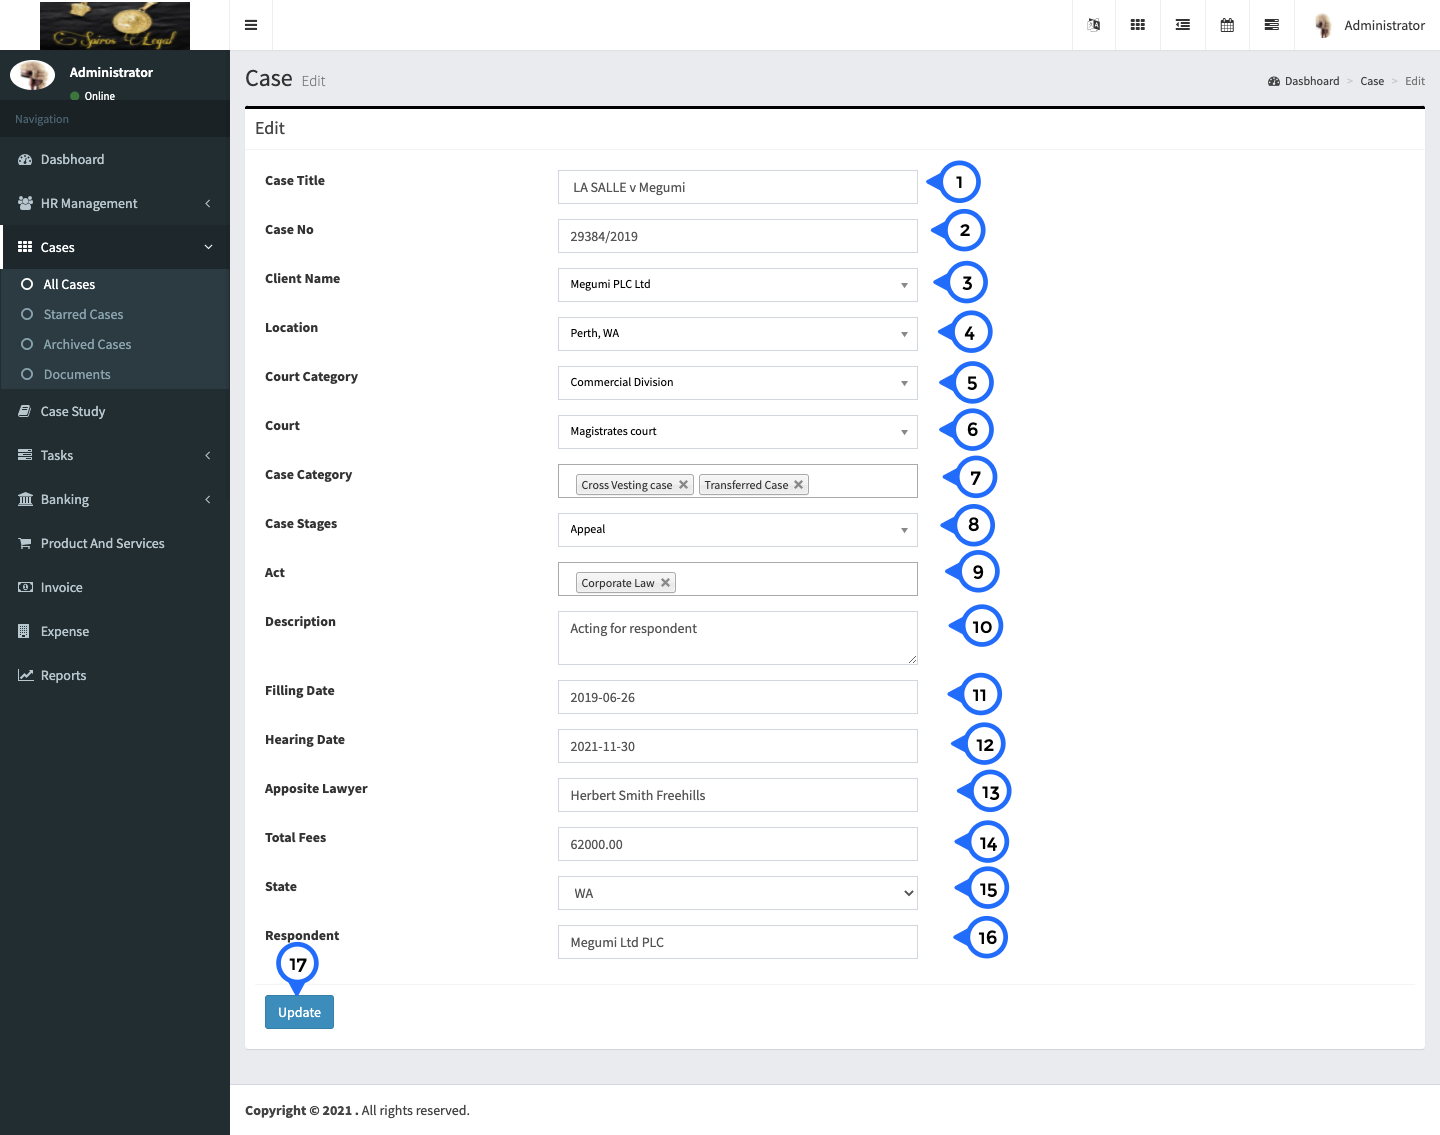
- 1) Case Title: Title of Case/Matter.
- 2) Case No: Number of Case which is opted from Court.
- 3) Client Name: Client belongs to particular case if not in list then need to Add New Client.
- 4) Location: Location of court in which case is running. Obtained from Location Master.
- 5) Court Category: Category of court in which case is running. Obtained from Court Category Master.
- 6) Court: Name of Court in which case is running. Obtained from Court Master.
- 7) Case Category: Category of Case. Obtained from Case Category Master.
- 8) Case Stage: Current Stage of Case. Obtained from Case Stages Master.
- 9) Act: Which Acts needs to perform in Case. Obtained from Act Master.
- 10) Description: Description of Case.
- 11) Filling Date: On Which Date case is filled in Court.
- 12) Hearing Date: On Which Date First Hearing is held in Court.
- 13) Apposite Lawyer: Name of Opposite Lawyer.
- 14) Total Fees: Fees of Case.
- 15) State: Selete case state.
- 16) Respondent: case respondent.
- 17) Update: all case form data update by click on update button.
Archieved
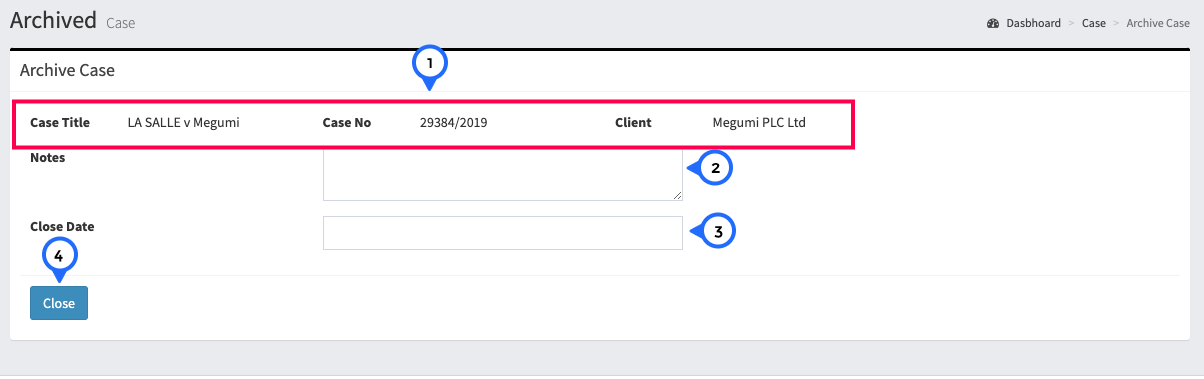
- 1) detail about case like case title, case no, client name
- 2) notes: add some notes
- 3) close date: archieve case close date set
- 4) close: click on close then particular case close.
Case Notes
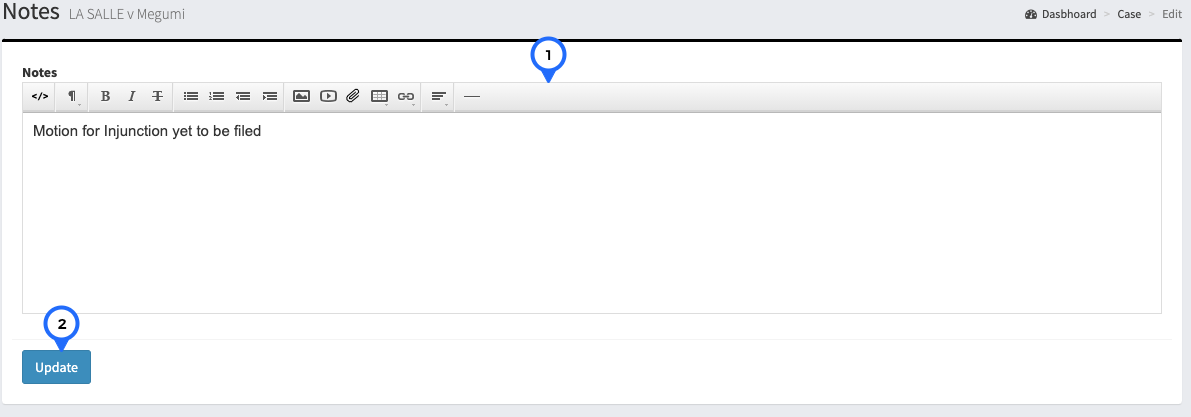
- 1) Note: here you can set any note related to particular case.
- 2) Update: click on this button then above notes updated.
Starred Cases
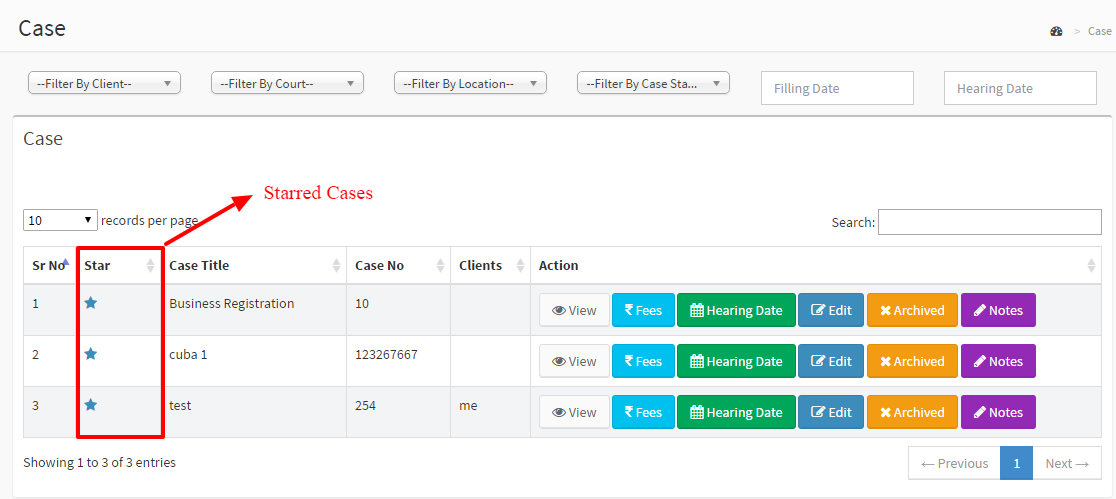
Starred Cases will show the list of cases which marked as important. After mark case Starred in All Cases, The case will show also in this list except Archived Cases. It is similar to All Cases
Archived Cases
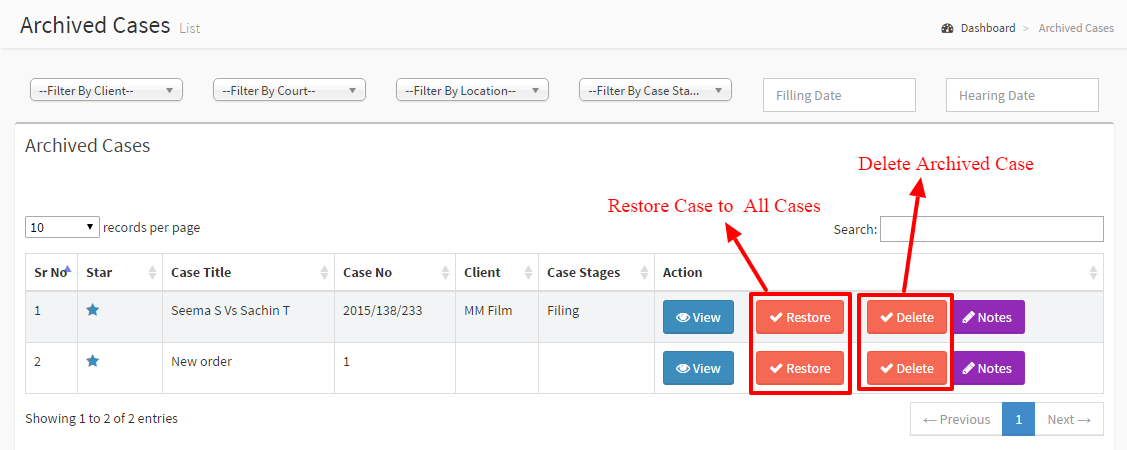
Archived Cases will show the list of cases which marked as archived. After mark case Archived in All Cases, The case will show in this list. It is similar to All Cases except Admin can delete the Archived Case or Can restore to All Cases.
Note : Case cannot create from Archived Cases and also can delete only from here.
Documents
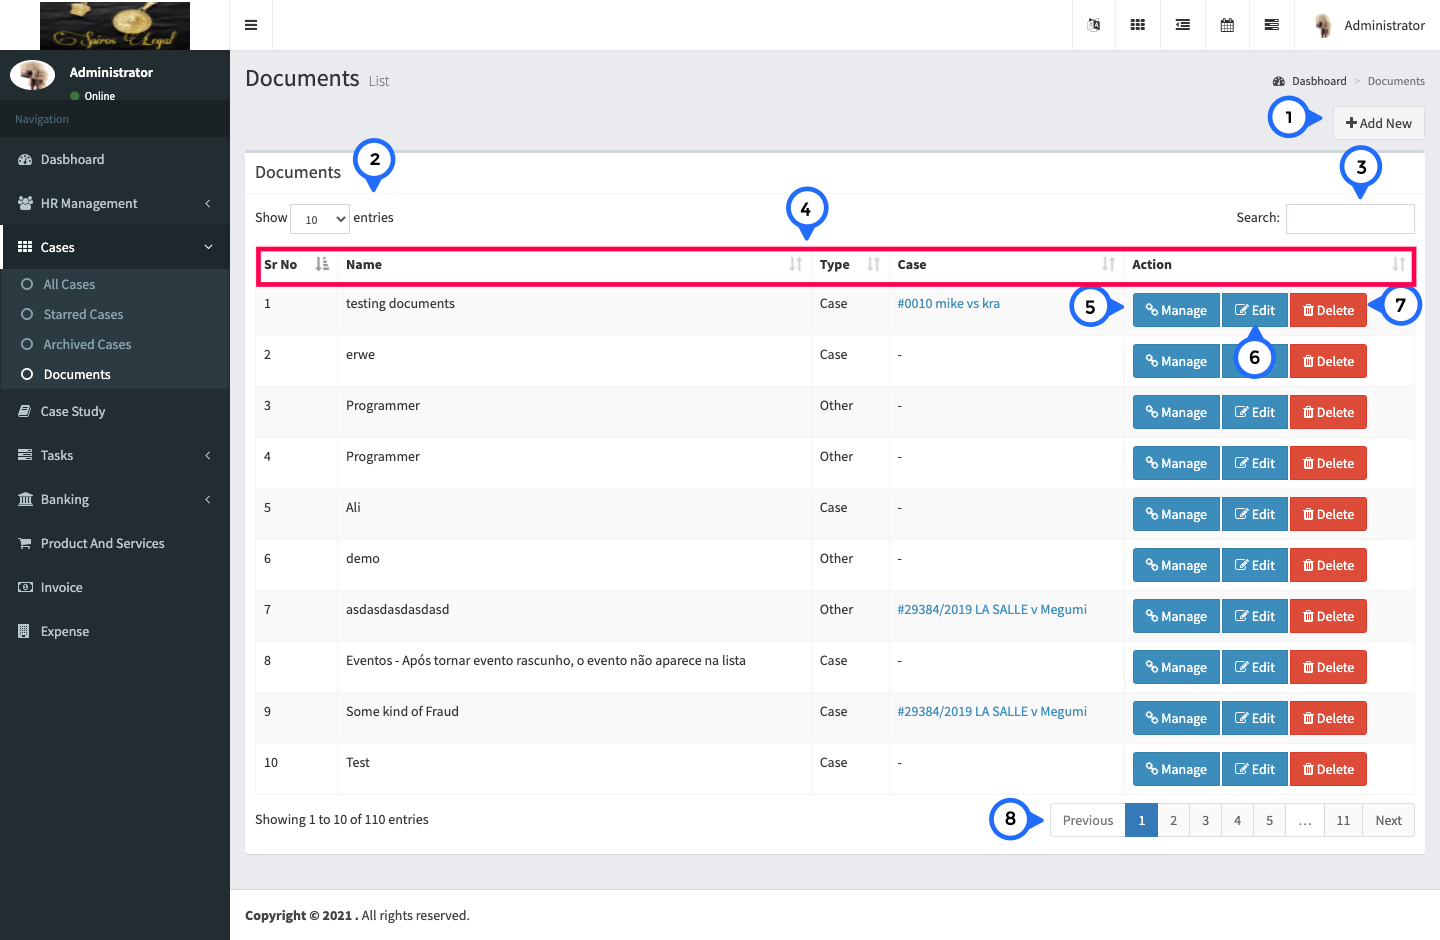
- 1) Add new: click on this button redirect to document form page.
- 2) show: show how many entries show in this table single page
- 3) search: search any documents
- 4) in this section show sr number, name of document, type, case, action
- 5) manage: you can manage case document.
- 6) edit: you can edit document
- 7) delete: you can delete particular document record
- 8) paggination: here you can see how many pages created goto previous and next page.
Document Form for Add and Edit
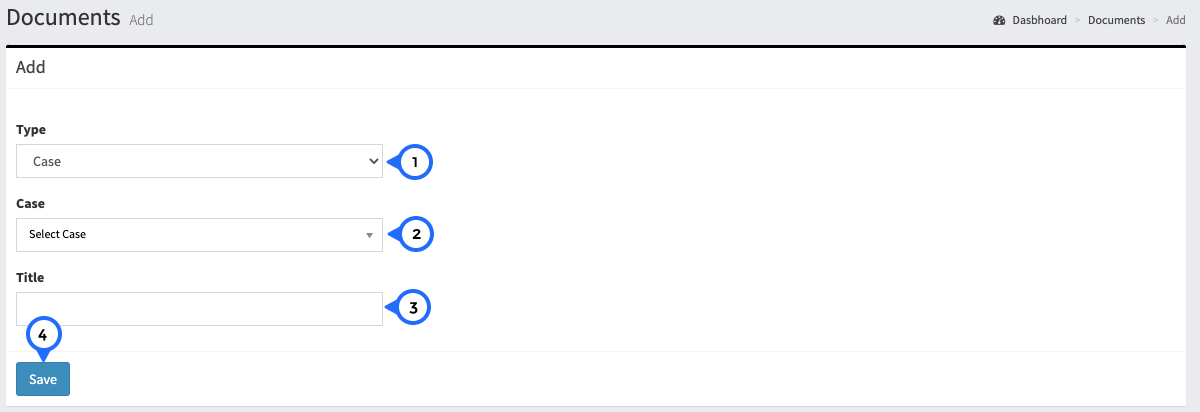
- 1) type: select case type from dropdown
- 2) case: select case from dropdown
- 3) title: set title of document
- 4) save: click on save then all form data save.
Manage Document
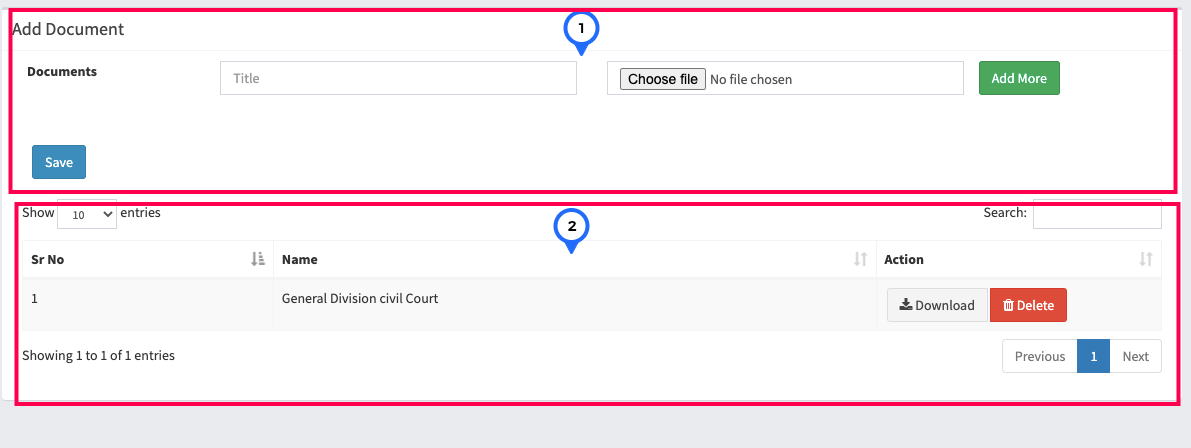
- 1) in this section you can add document title and document related file click on add more you can add more document and save
- 2) show the list of all document you can delete and dowonload particular document.